If you’re tired of fighting with loud stage wedges and muddy monitor mixes, you’re in the right place. Finding an affordable in ear monitor system is easier than you think, and it’s one of the single best upgrades you can make for your performers. These systems deliver crystal-clear audio right to each musician, dramatically improving clarity and even protecting their hearing—all without breaking the bank.
Your First Step to Crystal-Clear Stage Sound
Jumping into the world of in-ear monitors (IEMs) can feel intimidating, but the core idea is actually quite simple.
Think of it as giving every musician on your team their own personal radio station. Instead of blasting sound across the stage with floor monitors, an IEM system sends a custom-tailored audio mix directly into a performer's ears. This is an absolute game-changer for churches, school bands, and gigging artists who are serious about getting professional sound.
What Are the Parts of an IEM System?
At its heart, every wireless IEM system is made up of three key parts that work together. Once you understand what each piece does, the whole system makes perfect sense, and you'll feel much more confident picking out the right gear.
Let's quickly break down the essential components that make up any wireless in-ear monitor system.
Your Affordable IEM System Components at a Glance
| Component | What It Does | Why It's Important |
|---|---|---|
| Transmitter | The "radio station." It takes your monitor mix from the soundboard and broadcasts it wirelessly. | This is the starting point. It converts your audio into a radio signal that can be sent across the stage. |
| Receiver (Beltpack) | The portable "radio." It's worn by the musician and tunes into the transmitter's signal. | This piece gives the performer freedom to move. It receives the audio and makes it available for the earphones. |
| Earphones | The specialized earbuds. They plug into the receiver and deliver the sound to the musician's ears. | These are crucial for isolating outside noise, allowing the musician to hear their mix clearly at a safe volume. |
That’s it! Understanding this simple signal chain—Transmitter to Beltpack to Earphones—is the key to everything.
For instance, think about the worship leader at your church. She needs to hear her own voice clearly, along with the piano and just a touch of the choir. The sound tech creates that specific mix on the console, sends it to an IEM transmitter, and the worship leader hears it perfectly in her earphones via her beltpack, no matter where she moves on stage.
The shift away from a loud stage is huge. The global in-ear monitoring system market was valued at USD 1.5 billion in 2024 and is projected to hit USD 2.8 billion by 2033. This growth isn't just for big tours; it shows a clear trend toward more accessible and affordable monitoring for performers at every level. You can see the full report on the in-ear monitoring market for a deeper dive.
Key Takeaway: Moving to an IEM system lowers the overall stage volume. This not only helps your performers hear themselves better, but it also gives your sound engineer far more control, leading to a cleaner, more professional sound for the audience.
This simple setup—mixer to transmitter to receiver—is the foundation of every wireless affordable in ear monitor system. As we explore the different options out there, just keep this basic signal flow in mind. It's the key to unlocking consistent, high-quality monitoring for your whole team.
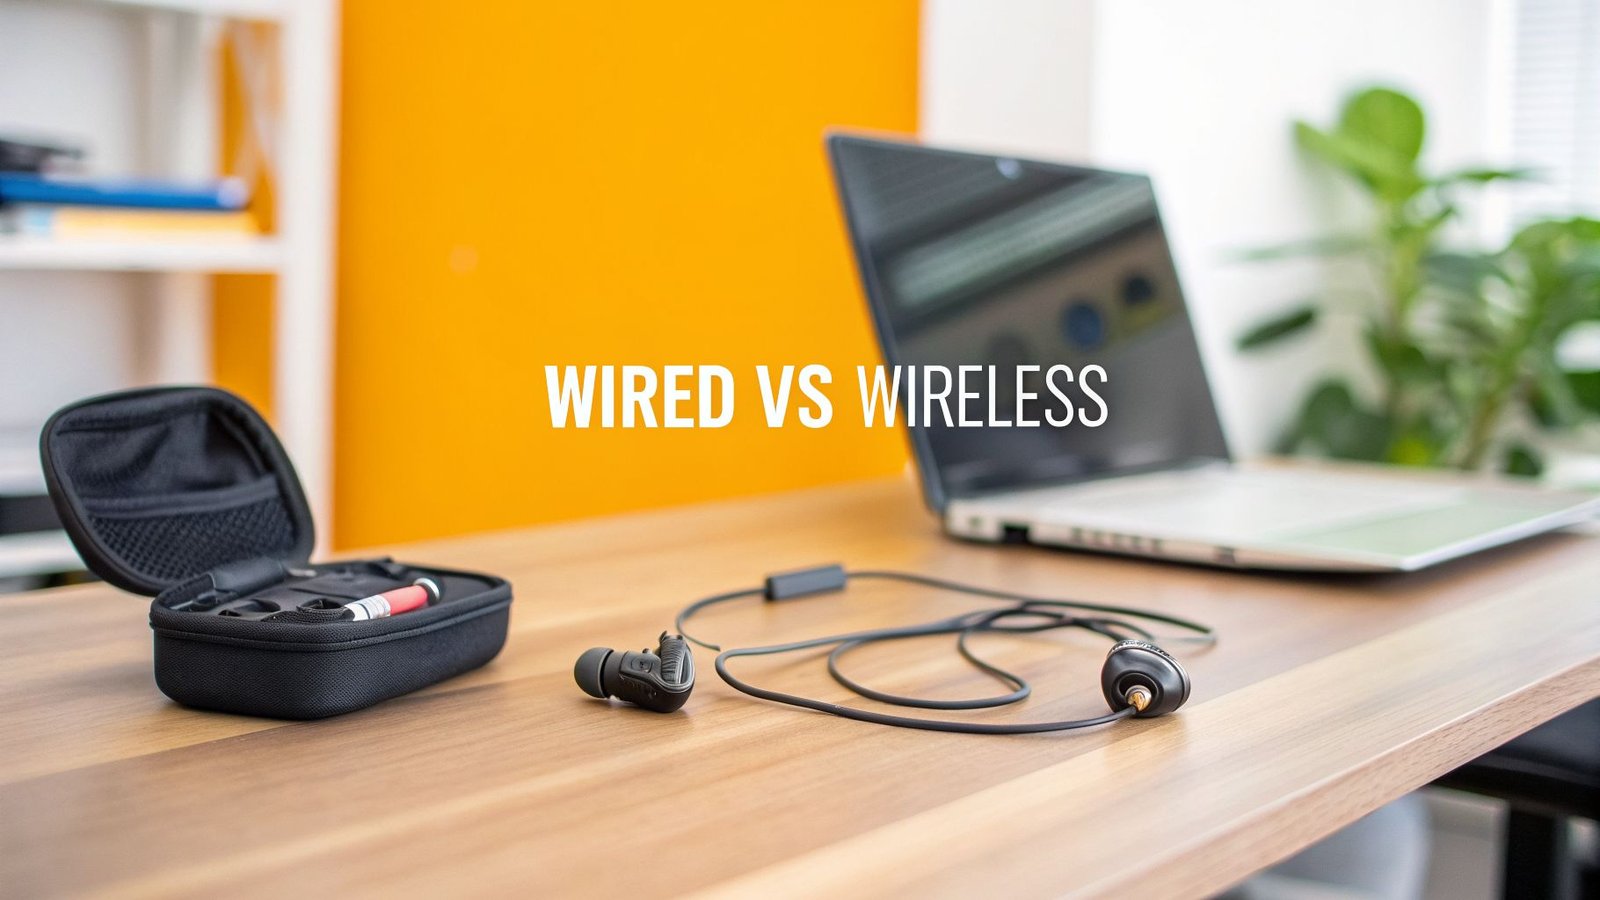
Choosing Between Wired and Wireless IEM Systems
When you're putting together an affordable in ear monitor system, your first big fork in the road is deciding between wired and wireless. This one choice has a major ripple effect on your budget, how you set up your stage, and how your musicians can perform. There's no single "right" answer—it all comes down to who is using the system and how much they need to move.
A wired system is as straightforward as it gets. It takes the monitor mix from your soundboard and sends it straight to a performer's beltpack through a good old-fashioned audio cable. It's a direct line, which makes it incredibly reliable and easy on the wallet.
On the other hand, a wireless system uses a transmitter to broadcast that same mix over a radio frequency (RF). A receiver beltpack picks up that signal, giving the performer total freedom from cables.
So, how do you decide which path to take? This simple table breaks down the core differences to help you figure out what makes the most sense for your team and your budget.
Wired vs Wireless IEMs: Which Is Right for You?
| Feature | Wired IEMs | Wireless IEMs |
|---|---|---|
| Best For | Stationary musicians (drummers, keys, orchestra) | Active performers (singers, guitarists, pastors) |
| Mobility | Limited to cable length; not mobile | Complete freedom of movement on stage |
| Cost | Very low ($50 – $70 per person) | Higher investment ($300+ per person) |
| Reliability | Rock-solid; immune to RF interference | Can be prone to dropouts or interference |
| Setup | Simple plug-and-play | Requires RF frequency management and scanning |
| Maintenance | Minimal; check cables for wear | Requires battery management (rechargeable or disposable) |
Ultimately, the best strategy for many churches and bands is a hybrid approach. Use wireless for the people who truly need to move, and stick with reliable, cost-effective wired systems for everyone else.
When to Choose a Wired IEM System
Wired systems are the perfect solution for any performer who stays planted in one spot. Think about your drummer, your keyboard player, or the musicians tucked away in a church orchestra pit. Since they aren’t running around the stage, a physical cable is a simple and brilliant fit.
The two biggest wins for a wired setup are its unshakable reliability and its much lower cost. You completely sidestep any risk of RF interference, signal dropouts, or the dreaded dead-battery moment mid-song. For a church or a school trying to make every dollar count, this is the most direct route to giving your musicians high-quality monitoring.
Practical Example: Your drummer has to hear the click track perfectly to keep the whole band locked in. A simple wired beltpack like the Behringer Powerplay P2 connects directly to an aux output from your mixer. This gives them a flawless, zero-latency mix of the click and their own drums. It's a bulletproof setup for less than $100.
While wireless systems tend to grab all the headlines, many organizations still put their money on value and reliability. In fact, market data projects that wired IEMs will still hold 55.1% of the global market share by 2025. This just confirms what we see in the field: for many, the dependability and low cost of a wired solution are benefits you just can't argue with. You can explore more market trends in the full IEM systems report.
When to Invest in a Wireless IEM System
The big advantage of a wireless IEM system boils down to one powerful word: freedom. For any dynamic performer who really owns the stage—your lead singer, an energetic guitarist, or an engaging worship leader—being tied down by a cable just won't work.
Wireless systems let these key people move, interact with the audience, and fully express themselves without the fear of tripping over or yanking out a cord. That freedom can make a huge difference in their stage presence and the quality of their performance, making it a worthy investment for your front-line musicians.
- Lead Vocalists: Need to move across the stage to connect with the crowd.
- Guitarists/Bassists: Can step forward for solos and engage with other band members.
- Worship Leaders: Can move freely from the stage into the congregation during a service.
Practical Example: Your church’s worship leader needs the flexibility to walk around while leading the congregation. An entry-level wireless system lets her hear her personal monitor mix anywhere on stage, ensuring she sounds her best without being anchored to one spot. This freedom helps her lead more effectively and creates a much more engaging experience for everyone.
Cost-Benefit Trade-Off
Let's talk real-world numbers. A dependable wired beltpack amplifier can cost as little as $50 to $70 per musician. You could get your whole stationary four-piece band (drummer, keyboardist, bassist, rhythm guitarist) set up for less than $300.
Now, compare that to wireless. A single, entry-level wireless IEM system starts around $300 to $500. To give that same four-piece band wireless freedom, your initial cost suddenly jumps to between $1,200 and $2,000.
The choice becomes pretty clear: spend your budget on wireless where it’s truly needed for your most dynamic performers. For everyone else, you can save a significant amount of money with reliable wired systems and still give them a fantastic monitoring experience.
Decoding the Tech Specs on a Budget
Diving into the tech specs for an affordable in ear monitor system can feel like you're trying to read a foreign language. But here's the good news: you only need to get a handle on a few key details to make a really smart purchase.
Understanding these specs is what ensures your investment actually delivers that clear, reliable sound you're after for every single performance. The three big concepts to wrap your head around are RF frequency bands, mono vs. stereo mixes, and the number of mixes your system needs to support. Let’s break down what each one really means for your band, church, or school.
Understanding RF Frequency Bands
Wireless IEM systems work using radio frequencies (RF). Just think of them as invisible highways in the air. Your transmitter sends your monitor mix down one of these highways, and the performer's beltpack receiver is tuned to that exact same highway to pick it up.
The challenge is that these highways can get incredibly crowded. Other wireless microphones, local TV stations, and even cell phone towers are all fighting for space. If your IEM system ends up on the same highway as another powerful signal, you’re going to get interference—static, dropouts, or even another group's audio in your ears.
To sidestep this nightmare, you need to pick a system that operates in a frequency band with open lanes in your specific area.
- Check Local Frequencies: Before you even think about buying, use an online tool to check for open TV channels in your zip code. This is a simple step that helps you choose a system that won't be battling local broadcasters for airtime.
- Coordinate Your Gear: If you already have wireless mics, you have to make sure your new IEM system can operate in a totally different frequency range. Otherwise, they'll interfere with each other, and you'll be chasing down problems all night.
- Look for Scanning Features: Most modern digital wireless systems have a built-in "scan" function. You press a button, and the system automatically finds a clear, open frequency for you. This takes all the guesswork out of setup and is a feature worth paying for.
Choosing the right frequency band is your first line of defense for a dropout-free performance. It’s a quick check that prevents a world of headaches down the road.
Mono vs. Stereo Mixes
Once you've got a clean signal path, the next decision is all about the audio itself: do you want a mono or a stereo mix? This choice affects both how things sound and the gear you're going to need.
A mono (monophonic) mix sends the exact same audio signal to both of your ears. It’s simple, it’s effective, and it only requires one auxiliary (aux) output from your mixing console for each performer.
A stereo (stereophonic) mix sends two different signals—a left and a right channel—to create a sense of space and width. This lets you pan instruments across the mix, just like you'd hear on a professional record. For example, you could move the rhythm guitar slightly to the left and the keyboard a bit to the right.
This separation in a stereo mix can dramatically improve clarity. Instead of a "wall of sound" hitting your ears, instruments have their own space, which makes it easier to pick out individual parts and can reduce listening fatigue over long performances.
Now, here’s the trade-off, and it's a big one. A true stereo mix for one performer requires two aux outputs from your mixer. This is the critical detail that catches so many people by surprise.
How Many Mixes Do You Really Need?
This brings us to the most important question for your budget: how many separate mixes do you need, and does your mixer have enough outputs to even handle them?
Every performer who needs to hear a different blend of instruments requires their own unique monitor mix. And each of those unique mixes has to come from a dedicated aux output on your mixer.
Practical Example: Let's say a five-member worship team wants to move to IEMs.
- The singer needs her voice way out in front of everything.
- The drummer needs a loud click track and the bass guitar.
- The guitarist just wants his guitar and the lead vocal.
- The bassist needs to lock in with the drums, his bass, and the keys.
- The keyboardist wants a balanced mix of the whole band.
That’s five people who all need five different things. If they all use mono mixes, your mixing console has to have at least five available aux outputs. If they all wanted to experience the clarity of stereo, you would need ten aux outputs (5 performers x 2 outputs each).
This is exactly why your mixing console is the real heart of your monitor system. A budget-friendly mixer might only have two or four aux outs, limiting you to just a couple of unique mixes. On the other hand, a digital mixer like the Allen & Heath Qu-16 has enough mix outputs to support a larger team with individual mono mixes. For even more flexibility, a mixer like the Midas M32 provides the massive I/O needed to give everyone on the team a stereo mix.
At John Soto Music, we can help you find the perfect affordable in ear monitor system and make sure your mixer has the muscle to drive it. Contact us today for a personalized recommendation, and let's build a system that grows with your team.
Proven IEM Recipes for Any Stage
Alright, we've covered the technical side of things. Now, let's put that knowledge into practice. Getting the right affordable in ear monitor system isn't about grabbing the most expensive box off the shelf; it's about building the right toolkit for your specific stage. The setup that works wonders for a small church will be totally different from what a touring band needs.
To make it easy, I've put together three "recipes" for common situations. Think of these as starting points. Each one lists the gear you'll need, shows you how it all hooks up, and explains how to get that pro-level monitoring experience without breaking the bank.
Setup 1: The Small Church Worship Team
For a small church with a dedicated volunteer team of 3-5 members, the game is all about simplicity, reliability, and being smart with the budget. Since most of your musicians—like the drummer and keyboard player—are stationary, we can save a ton of money by building the core of the system with wired beltpacks.
This whole setup hinges on having a modern digital mixer. It’s the real heart of the operation.
Gear List:
- Digital Mixer: Something like an Allen & Heath CQ-18T or Qu-16. The key is having plenty of "aux outputs" to create separate monitor mixes for everyone.
- Wired Beltpacks: One Behringer Powerplay P2 for each musician who doesn't move around (drummer, keys, maybe the bassist).
- Earphones: A quality pair of IEM earphones for every single performer.
- Cables: Long XLR cables to connect the mixer's aux outputs to each P2 beltpack on stage.
How It Works:
This is where the magic happens. Your sound tech uses the mixer's app (on a tablet or computer) to build a custom mix for each musician. Each of these mixes gets sent out of its own aux output on the back of the mixer. An XLR cable then carries that personalized mix across the stage right to the musician's P2 beltpack, where they can control their own volume.
Practical Example: The drummer gets a mix heavy on the click track and bass so they can lock in the groove. The keyboardist gets a completely different mix focused on the lead vocals and their own keys. This gives everyone exactly what they need to hear to play their best, and the hardware costs less than $100 per person. It’s an incredibly effective and budget-friendly solution.
Setup 2: The School Band Program
When you're dealing with a school band or a pit orchestra, durability and speed are everything. The gear has to survive daily use by students, and the system needs to be simple enough for a band director to get it up and running in minutes. Once again, a wired system is the most practical and affordable way to go.
This setup is perfect for a group of seated musicians, like a jazz ensemble or theater orchestra.
Gear List:
- Headphone Amplifier: A multi-channel headphone amp is your best friend here. Something like the Behringer HA8000V2 gives you 8 stereo channels in one box.
- Earphones: Durable, entry-level IEMs for all the students.
- Cables: Headphone extension cables are a must, giving students enough slack to play comfortably without yanking on the amp.
How It Works:
Instead of spending time creating a dozen individual mixes, the director can create just one or two main monitor mixes from the soundboard—for instance, a "Rhythm Section" mix and a "Horns" mix. These are sent to the inputs of the headphone amplifier. From there, each student plugs their earphones into one of the amp's output channels and gets their own personal volume knob.
This method is incredibly efficient. It lets you feed monitors to up to 8 musicians using just one or two of your mixer’s outputs. It makes setup and teardown a breeze, which is absolutely crucial in a busy school schedule.
Setup 3: The Gigging Band’s First Wireless Rig
If you're in a band that's playing different clubs every weekend, you live and die by portability, fast setup, and the freedom to move. This is where investing in a wireless affordable in ear monitor system really starts to pay dividends. The goal is to get a perfect mix to your most active performers so they aren't tripping over cables.
This rig is designed to give the lead singer and lead guitarist the freedom they need to own the stage.
Gear List:
- Wireless IEM System: Two starter wireless IEM kits from a reputable brand (like Shure or Sennheiser), one for the singer and one for the guitarist.
- Antenna Combiner: This is a non-negotiable upgrade when you run multiple wireless systems. It prevents your transmitters from fighting each other and causing dropouts.
- Digital Mixer: A small, powerful digital mixer like the Allen & Heath CQ-12T that you can control from a tablet is perfect for a portable rack.
- Wired Beltpacks: For the stationary players like your drummer and bassist, stick with the reliable Behringer P2s. It saves money and eliminates potential wireless headaches.
How It Works:
You build a small rack case that holds your compact digital mixer, the IEM transmitters, and the antenna combiner—all pre-wired and ready to go. When you get to the gig, you just plug in power and your mics. The singer and guitarist are completely untethered, hearing a flawless mix from their wireless beltpacks no matter where they go on stage. Meanwhile, the rhythm section is locked in with their rock-solid, interference-free wired packs.
Let Us Build Your Perfect System
Feeling a bit overwhelmed? Don't be. This is what we do. At John Soto Music, we specialize in putting together custom-tailored solutions that just work. We can bundle any of these setups into a turnkey package designed specifically for you.
Special Offer: Let us assemble your complete IEM package—mixer, transmitters, receivers, and cables—all tested and ready to go right out of the box. We’ll even throw in free shipping on the entire bundle.
Contact a John Soto Music expert today, and let's build a system that gives your team the crystal-clear sound they deserve.
How to Set Up Your First In-Ear Monitor System
So you've unboxed your new gear, and the excitement is real. But now you're staring at a box of transmitters, receivers, and cables, and turning it into a working, reliable in-ear monitor system feels like the next big hurdle. Don't sweat it. I'm going to walk you through the essential steps, from plugging things in to building that first mix. You'll have clear, consistent sound in your ears before you know it.
This whole process follows the same fundamental path, whether you’re setting up for your church, a school auditorium, or your band’s next gig. The core principles don’t change.
The main takeaway here is that connecting your mixer, transmitter, and receiver is a universal process. Get this down, and you can set up a system anywhere.
The Physical Connections
First things first, we need to get everything hooked up. This is the physical foundation of your system, creating the path for audio to travel from your soundboard to the performer's ears. It looks more complicated than it is.
Antenna First: Before you even think about plugging in the power, attach the antenna(s) to your IEM transmitter. Powering on a transmitter without its antenna connected is a surefire way to damage the unit. For the best signal, try to place the transmitter somewhere it has a clear line of sight to the stage.
Mixer to Transmitter: Find the auxiliary (aux) outputs on your mixing console. Grab a standard XLR or TRS cable and connect one of those aux outputs to an audio input on the back of your IEM transmitter. Remember, each aux output will feed one unique monitor mix to one transmitter.
Power Up: Now it’s safe to connect the power supply to your transmitter and switch it on. Go ahead and pop some fresh batteries into the performer's receiver beltpack and power that up, too.
Those three steps create the physical highway for your audio. Next, we need to make sure the transmitter and receiver are on the same page.
Pairing Your Transmitter and Receiver
Your transmitter and receiver need to be set to the exact same radio frequency (RF) channel to talk to each other. It’s just like tuning your car radio to a specific station—if you’re on the wrong frequency, all you get is static.
Step 1 – Scan for a Clear Channel: Nearly all modern digital IEM systems have a "scan" function. Use it. This feature will check the airwaves in your venue and find an open frequency that’s free from interference.
Step 2 – Sync the Devices: Once you’ve found a clean channel on one device, you have to match it on the other. Many systems make this incredibly easy with an "IR Sync" feature. You just hold the receiver’s IR window up to the transmitter’s, and they automatically sync up. It’s that simple.
Pro Tip: If you're running multiple wireless systems (like IEMs plus some wireless mics), every single system needs its own, unique frequency. The best practice is to turn on all your gear and scan for a clean channel on each device one by one. This prevents them from stepping on each other's signals.
Creating the Monitor Mix
With all the hardware connected and paired, the real magic happens back at the mixing console. This is where you actually build the personalized mix that the musician will hear in their ears. For this example, let's assume we're using a digital mixer app on a tablet, which is common for most churches and bands today.
Select the Performer's Aux Mix: On your mixer's app or surface, find and select the aux mix that corresponds to the performer. If you plugged their transmitter into "Aux 1" on the back of the board, you need to be adjusting the "Aux 1" mix on the screen.
Build the "More Me" Mix: The absolute golden rule of mixing monitors is to start with the performer's own instrument or voice. Push up the fader for their channel first. Get their own signal to a point where they can hear themselves clearly and comfortably. This is their anchor.
Add Other Elements: Once they have a solid foundation of themselves, you can start to slowly bring in the other key instruments they need for musical reference. A singer will almost always need the main chordal instrument (like a piano or acoustic guitar). A drummer will need the bass guitar and maybe a click track. The key is that less is more—don't muddy up their mix with everything.
Fine-Tune and Get Feedback: Now, talk to the performer. Ask them what they need more or less of. Building a great monitor mix isn't a one-way street; it’s a collaboration. Make small, deliberate adjustments until they have a clean, balanced mix that helps them give their best performance.
By following these steps, you can turn that box of gear into an empowering tool for your whole team. Mastering this setup process is a massive win for any sound tech or volunteer, ensuring you have a smooth first run and a successful gig.
Your Last-Minute IEM Questions, Answered
Making the jump to an affordable in ear monitor system is a big move. It’s completely normal to have a few questions swirling around before you pull the trigger. You need to be confident that this investment will serve your team well for years to come.
We get it. At John Soto Music, we talk to people about this stuff every single day. This last section is all about tackling the most common questions we hear, giving you clear, practical answers so you can feel 100% sure about your decision.
Can I Use Any Headphones with an IEM System?
Technically, you can plug any pair of 3.5mm headphones into a receiver beltpack. But we strongly, strongly advise against using regular consumer earbuds for any kind of live performance. It’s a bad idea for two critical reasons: sound isolation and accurate sound reproduction.
Professional IEM earphones are built to create a seal in your ear canal. This seal physically blocks out the punishingly loud ambient noise on stage—the crash of the drum kit, the bleed from floor wedges, the roar of the amps. This isolation is everything. It lets you hear your mix clearly at a much lower, safer volume, which is crucial for protecting your hearing long-term.
Practical Example: Picture your drummer trying to use regular earbuds. To hear the click track over their own acoustic drums, they’d have to blast the volume to dangerous levels. With proper isolating IEMs, all that external noise is dramatically reduced. The click track can then be set to a comfortable, safe level, which not only prevents hearing damage but also tightens up their performance.
On top of that, professional IEMs are designed for a flat, accurate frequency response. They give you the sound exactly as the engineer mixed it. Consumer earbuds, on the other hand, are usually hyped in the bass and treble to make music sound more "exciting." That completely warps the monitor mix you rely on to play your part correctly.
How Many Separate Monitor Mixes Can I Create?
This is one of the most important questions, and the answer has everything to do with your mixing console, not the IEM system itself. The number of unique, individual monitor mixes you can run is determined by the number of auxiliary outputs (often called "aux sends" or "mix buses") on your mixer.
For every musician who needs their own custom mix, you need one dedicated aux output for a mono mix, or two aux outputs for a stereo mix. It’s that simple.
- Small Mixer Example: A basic analog mixer might only have one or two aux sends. That means you can only create one or two different monitor mixes for the entire band.
- Digital Mixer Example: A board like the Allen & Heath Qu-16 provides multiple mix outputs. This makes it easy to give a 5-piece band five separate mono mixes. This is why a good digital mixer is the true heart of an effective and affordable in ear monitor system.
Before you buy a single piece of IEM gear, the very first thing you should do is count the available aux outputs on your mixer. That number tells you exactly what your rig can support.
Do I Need an Antenna Combiner?
If you plan on running more than two or three separate wireless IEM transmitters, an antenna combiner stops being a luxury and becomes an essential piece of gear. When you start racking up multiple transmitters right next to each other, each with its own little antenna, you create what pros call an "antenna farm."
This tangled mess of antennas creates a chaotic RF environment where they all interfere with each other. This dramatically increases the risk of signal dropouts right in the middle of a show, which is a massive source of frustration for any growing band or church team.
An antenna combiner solves this problem cleanly and professionally. It takes the signal from all your IEM transmitters and feeds them into a single, more powerful, and better-positioned antenna. This move cleans up all that intermodulation interference and makes every single one of your wireless systems drastically more reliable. If you only have one or two systems, you can get by. For three or more, it's a critical upgrade for a professional, dropout-free performance.
At John Soto Music, we live and breathe this stuff every day. We know that piecing together the right affordable in ear monitor system can feel complicated, but our team is here to make it simple. We can help you match the perfect gear to your mixer, your budget, and your stage.
Ready to get crystal-clear sound in your ears? Explore our curated selection of IEM systems and get the expert advice you need today. Find your perfect monitoring solution at https://www.johnsotomusic.com.