
A guitar amp cabinet is way more than just a wooden box holding some speakers. It’s the final, and I'd argue most important, part of your entire rig's voice. While your amp head creates the raw tone, the cabinet is what translates that electrical signal into the actual sound everyone in the room hears, shaping its final character, feel, and power. Finding the right one is the key to unlocking your true sound.
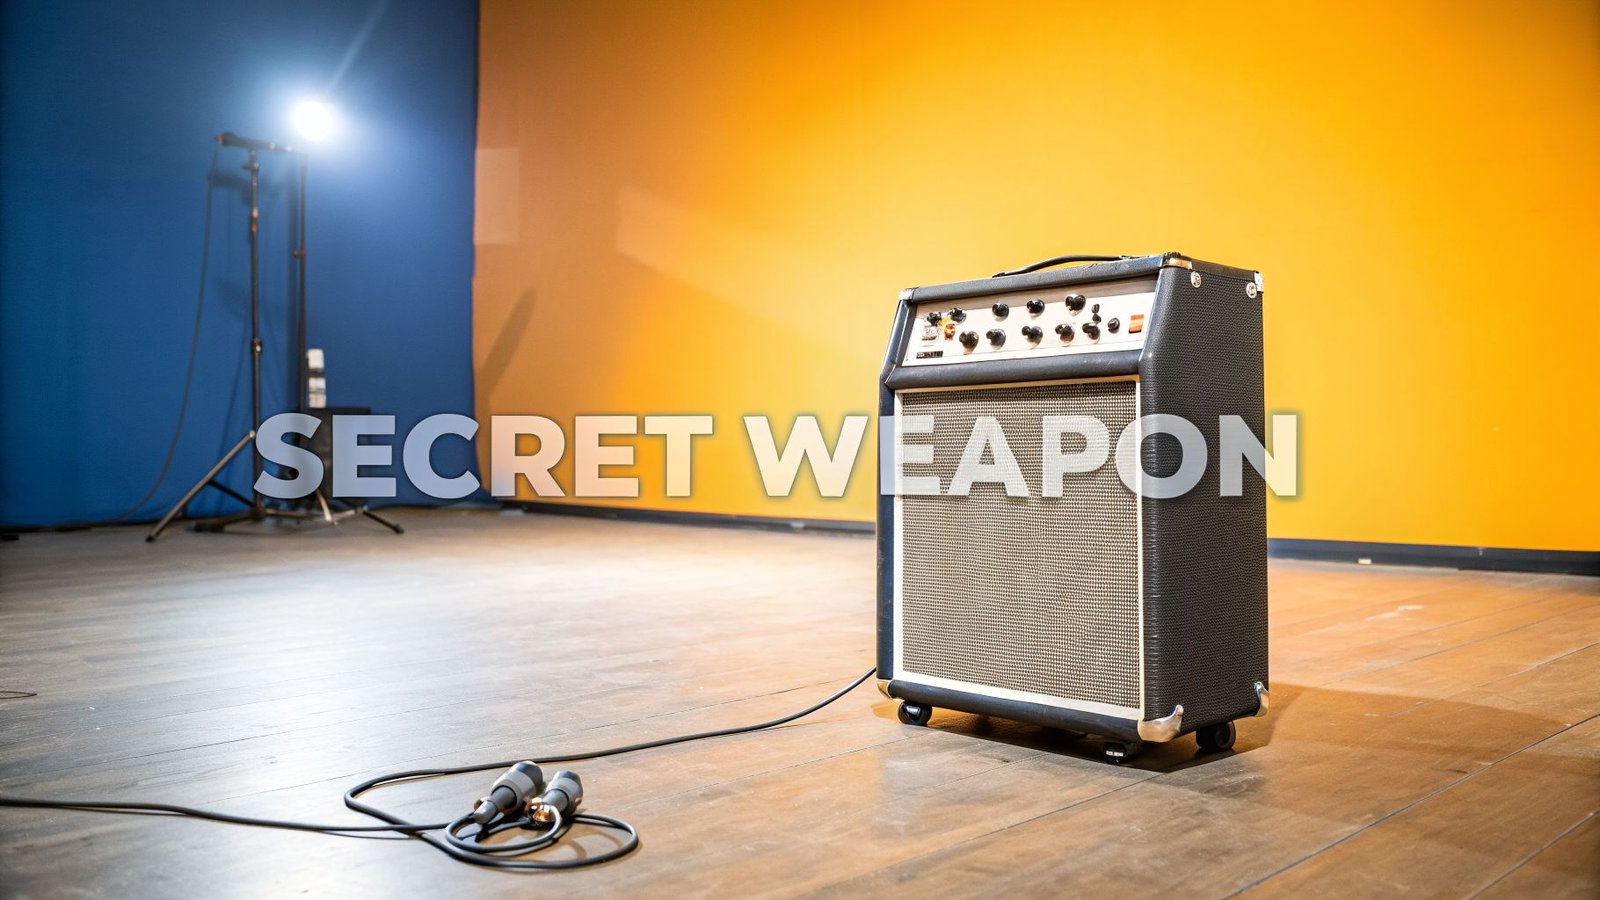
Why Your Guitar Cabinet Is Your Rig’s Secret Weapon
Think of it like this: your guitar, pedals, and amp head are a world-class songwriter and a phenomenal singer. The amp cabinet is that singer's unique voice. Just as a singer’s vocal cords and physical presence give a melody its distinct quality, the cabinet gives your guitar's sound its final texture and sonic footprint.
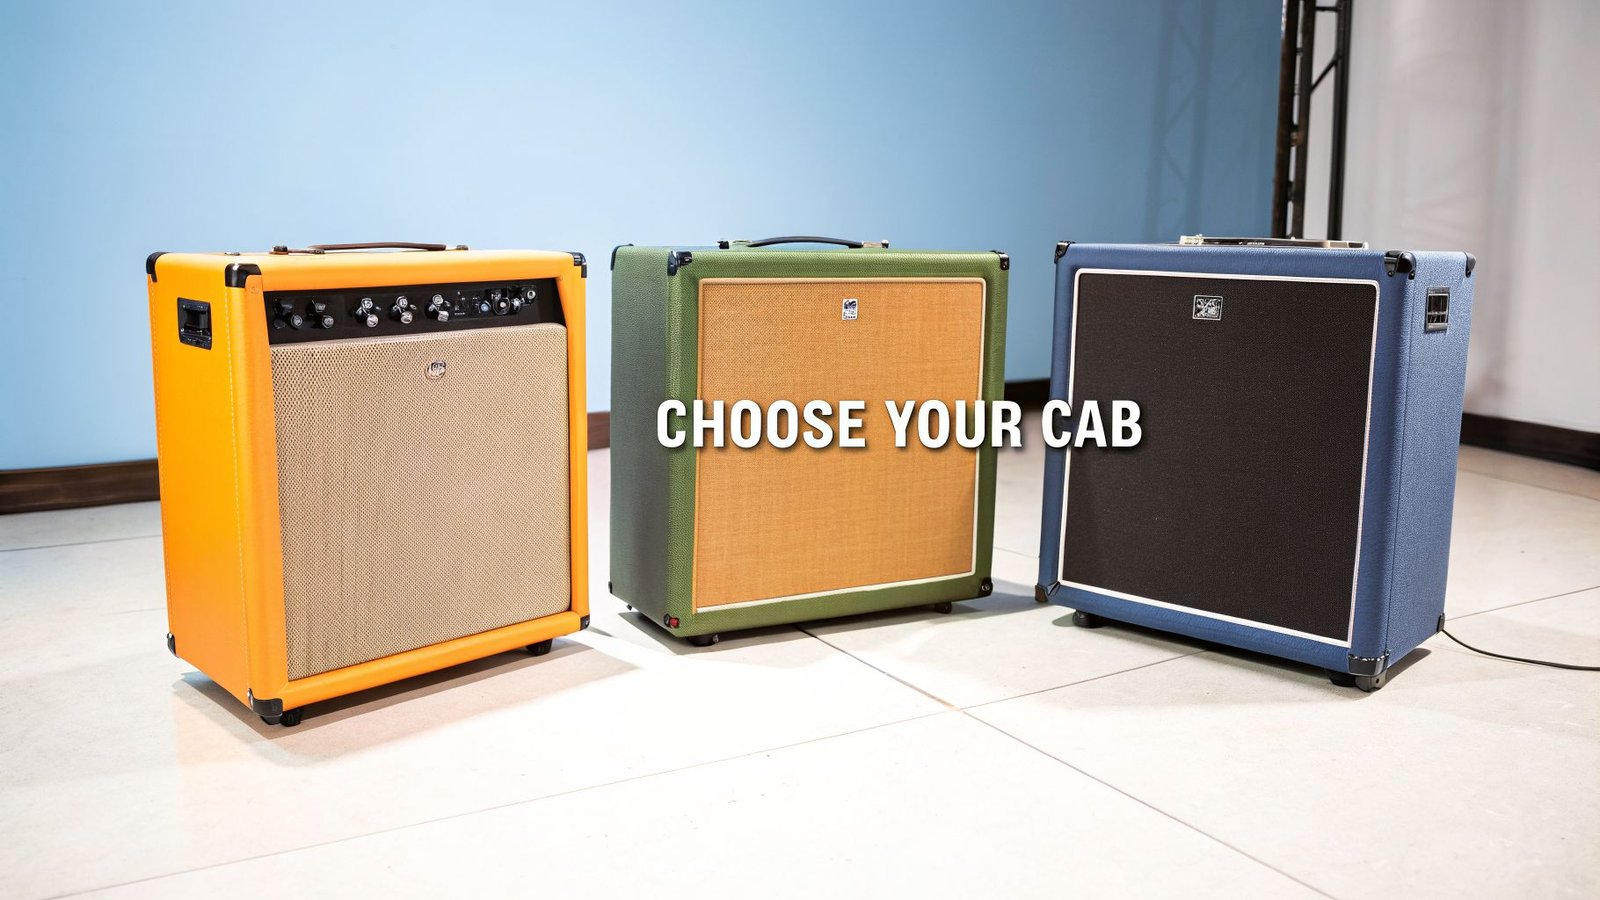
This modular approach, using separate heads and cabinets, is a favorite in professional settings like churches, schools, and live venues. The reason is simple: flexibility and control. You can mix and match different amp heads with various cabinets to perfectly dial in your sound for any room or musical style—something an all-in-one combo amp just can’t offer as easily.
Sound Shaping and Practicality
The size of a cabinet and the speakers inside have a massive impact on your sound. A small, single-speaker cabinet projects a tight, focused tone that's perfect for miking up on a controlled stage or in a studio. On the other hand, a big four-speaker cabinet moves a ton of air, creating that huge, immersive sound that fills a large stage and hits you in the chest.
This adaptability is a key reason why the market for standalone guitar amp cabinets shows such strong growth. While the broader guitar amp market is holding steady, projections show the cabinet segment is set to grow at a robust 5.0% CAGR to reach USD 450 million by 2033. This growth is really driven by commercial use in venues, churches, and festivals that demand these versatile, modular setups. North America is leading the charge, making up over 40% of global amp revenues, which is no surprise given our decades of live music innovation. You can review the full market analysis of guitar amplifiers for more details.
A separate head and cabinet rig gives you the power to upgrade or change your sound one piece at a time. If your tone needs more low-end punch, you can simply swap to a larger or closed-back cabinet without replacing your entire amplifier. This makes it a smarter long-term investment.
Ultimately, choosing the right guitar amp cabinet is about matching the gear to the job. It's about finding the tool that will deliver the sound you have in your head. The table below gives you a quick-reference guide to how different speaker configurations serve unique purposes, helping you see at a glance which option might be the best fit for your needs.
Common Guitar Amp Cabinet Configurations At A Glance
Here's a breakdown of the most common cabinet setups you'll encounter. Think of this as a starting point to help you connect a specific cabinet type to the sound you're chasing.
| Configuration | Sound Profile | Best For |
|---|---|---|
| 1×12 | Tight, focused, and punchy. Excellent midrange clarity. | Studio recording, small gigs, practice, and mic-friendly stage setups. |
| 2×12 | Wider soundstage than a 1×12 with more low-end. Can be tight or broad depending on orientation (vertical vs. horizontal). | Most gigging situations, rehearsals, and players wanting a "bigger" sound without the weight of a 4×12. |
| 4×10 | Punchy, bright, and quick response. Often associated with a "spankier" tone with less low-end boom than a 4×12. | Blues, funk, and country players. Great for cutting through a dense band mix. |
| 4×12 | The classic "stack." Huge low-end, massive sound projection, and a complex, room-filling tone. | Large stages, loud bands, and genres like rock, hard rock, and metal that demand maximum volume and presence. |
Each of these configurations offers a distinct flavor, and the "best" one truly depends on the music you play, the venues you're in, and the specific amp head you're using. Don't be afraid to experiment
Choosing Your Sound With The Right Speaker Configuration
If the amp head is the brain of your rig, the speaker cabinet is its voice. The speakers inside are where your tone really comes to life, and the size, number, and type of those speakers will completely shape your final sound. It’s the difference between a whisper and a roar.
Choosing the right configuration is how you take the sound in your head and make it real for the ears in the room.
The number of speakers in a cabinet—you’ll see this written as 1×12 (one 12-inch speaker), 2×12 (two 12-inch speakers), or the classic 4×12—changes more than just volume. It’s about how the sound feels and how much air it moves.
Matching Configuration to Venue
A compact 1×12 cabinet is an absolute workhorse. It delivers a tight, focused sound that sound techs love because it’s incredibly easy to mic up cleanly. For a small church service or a coffee shop gig, this is perfect. It keeps stage volume under control and gives the front-of-house engineer a pure signal to work with.
Stepping up to a 2×12 cabinet gives you a wider, more three-dimensional sound. With two speakers moving air, you get a fuller low-end and a bigger sonic footprint that’s great for a medium-sized stage, like a school auditorium or a growing worship sanctuary. For many gigging players, it's the goldilocks zone: all the power you need without the back-breaking weight.
And the iconic 4×12 cabinet? It’s the king of the rock stage for a reason, pushing a massive wall of sound with a low-end punch that you feel in your chest.
Practical Example: A worship guitarist playing through a 1×12 cabinet like a Mesa/Boogie 1×12 Mini Recto Slant gets a punchy, articulate tone that’s a dream to mic. If that same guitarist starts playing larger venues, a 2×12 cabinet like the Orange PPC212 offers a much bigger soundstage without the logistical headache of a 4×12, making it a versatile choice for almost any gig.
The Voice of the Speaker Itself
Now, let’s go deeper. Beyond just the number of speakers, the specific model inside the cabinet is a huge piece of the puzzle. Different speakers have completely different personalities and can define the sound of entire genres.
- Celestion Vintage 30: This is arguably the most famous speaker in modern rock and metal. It’s known for a powerful midrange that cuts right through a busy mix and a tight low-end that never gets flabby.
- Celestion Greenback: If you’re after a warmer, more organic tone, this is your speaker. It has that classic rock "kerrang" with a smoother midrange and a vintage feel. It’s a favorite for blues, classic rock, and worship players who want a less aggressive voice.
Choosing a cabinet isn't just about making noise—it's about finding your signature sound. Whether you need the focused punch of a 1×12 for an intimate service or the wide-open roar of a 2×12 for a school event, the right guitar amp cabinet is waiting at John Soto Music to give your rig its perfect voice.
Decoding The Tech Specs That Define Your Tone
Getting into the technical side of guitar amp cabinets can feel like learning another language. The good news is you only need to understand three key specs to make choices that are safe, sound great, and protect your investment. Let's break down impedance, power handling, and sensitivity into real-world terms you can use right away.
It's no surprise that pro-level gear has a solid foothold in the live music world. In 2024, the global market for guitar amp cabinets hit USD 300 million, a clear sign of how crucial these boxes are for working musicians. That number is expected to climb to USD 450 million by 2033, growing at 5.0% each year. This tells us one thing: the demand for powerful, reliable tone isn't going anywhere. You can dig deeper into these numbers in the full market report on guitar amp cabinets.
Understanding Impedance In Ohms
Think of impedance (measured in ohms, or Ω) as the amount of resistance your cabinet gives back to your amplifier. An easy way to picture it is with a water hose. A lower impedance value (like 4 ohms) is a wide hose that lets a lot of power flow through easily. A higher value (like 16 ohms) is a narrow hose that restricts the flow.
Here’s the most important rule you need to know: always match your amp’s output impedance to your cabinet’s impedance. If your amp head has an 8-ohm output jack, it needs to be plugged into an 8-ohm cabinet.
Mismatching these values puts a serious strain on your amp’s transformer. This will kill your tone and, especially with tube amps, can cause expensive damage.
Power Handling In Watts
Power handling (measured in watts, or W) tells you exactly how much juice a cabinet can take from an amp before you risk damaging the speakers. The rule here is simple and non-negotiable: your cabinet's power handling rating must be equal to or greater than your amp's output power.
- Safe Match: A 50-watt amp head running into a 100-watt cabinet. This is perfect. The cab has more than enough headroom to handle whatever the amp sends its way.
- Risky Mismatch: A 100-watt amp head pushing a 50-watt cabinet. This is a recipe for disaster. You are practically guaranteed to blow those speakers, which is an expensive and completely avoidable mistake.
Always err on the side of caution. A cabinet with a higher power rating is always the safer choice. This is especially critical for places like schools and churches where different people might be using the gear.
Speaker Sensitivity In Decibels
Speaker sensitivity (measured in decibels, or dB) is one of the most overlooked specs, but it has a huge impact on your volume. It tells you how efficiently a speaker turns watts (power) into decibels (loudness). A higher sensitivity rating means a louder speaker, even with the same amount of power.
Let's imagine you have two different 1×12 cabinets. Both are rated at 8 ohms and you’re using the same 20-watt amp.
- Cabinet A: Sensitivity of 97 dB
- Cabinet B: Sensitivity of 100 dB
Even with the exact same amp and settings, Cabinet B will be significantly louder than Cabinet A. A difference of just 3 dB is the same as doubling your amplifier's power! This is critical information if you want to get more volume from a smaller amp or need a cab that can compete with a loud drummer without requiring a massive head.
Building The Perfect Rig Around Your Amp And Cabinet
Connecting your amp head to a speaker cabinet is where the magic really happens. It’s more than just plugging in a cable; it’s about making smart choices to create a complete system that not only sounds fantastic but is also practical for where you play.
Let's walk through a few real-world examples to see how different players can pair the right guitar amp cabinets with their specific amps to achieve their ideal tone.
For The Modern Worship Guitarist
If you’re a worship guitarist using a modeler like a Kemper Profiler or a Line 6 Helix, your entire sound is meticulously crafted inside that digital unit. You've dialed in the perfect amp models, cab simulations, and effects. The absolute last thing you want is a traditional guitar cab adding its own sonic flavor and messing up all that hard work.
This is exactly why an FRFR (Full Range, Flat Response) cabinet is your best friend.
- What it is: Think of an FRFR cabinet as a high-fidelity PA speaker or studio monitor built for the stage. Its job is to reproduce the sound you feed it as accurately as possible, without adding any coloration.
- Why it works: For a Kemper, an FRFR cab makes sure that the pristine Marshall stack profile you love actually sounds like a Marshall stack—not a Marshall running through a Fender-style cab. It just delivers the truth.
- Practical Example: A guitarist running a Helix can plug directly into an FRFR cabinet like the Headrush FRFR-112. This gives you a powerful, consistent tone on stage that perfectly matches the direct signal the sound engineer gets, creating a seamless experience for the congregation.
For The Classic Jazz Player
Now, let's shift gears to a jazz player in a small club. They’re using a vintage-style tube amp prized for its warmth and clean headroom. For this player, sterile accuracy isn't the goal; it's all about adding depth, air, and character.
An open-back 1×12 cabinet is the perfect match here. The open-back design lets sound pour out of both the front and the back, creating a wonderfully airy, room-filling sound that feels more three-dimensional.
An open-back cabinet interacts with the room, making the sound feel bigger and more immersive. This is ideal for styles like jazz and blues where ambience and sonic "space" are part of the music.
A fantastic pairing would be a low-wattage tube head and a lightweight pine 1×12 cabinet loaded with a speaker known for a smooth top end. This kind of rig breathes. It delivers warm, articulate tones that are perfect for complex chord voicings and dynamic solos without ever overpowering the rest of the band.
For The Gigging Rock Player
Finally, let’s look at a rock guitarist playing clubs and small venues. They need power, punch, and a strong low-end that can cut through a loud drummer. But they also have to contend with tiny stages.
A vertical 2×12 cabinet is a brilliant solution for this exact scenario.
- Big Sound, Small Footprint: It gives you almost the same speaker area as a traditional horizontal 2×12, but it takes up way less precious floor space.
- Better Monitoring: The top speaker is angled up toward your ears, which means you can actually hear yourself clearly without cranking the volume to deafening levels.
- Practical Rig: Pairing a powerful head like a Marshall DSL or an Orange Rockerverb with a vertical 2×12 like the Orange PPC212V gives you a commanding stage presence and a massive sound that can hang with a 4×12, but it's infinitely easier to haul and fit on a crowded stage.
Once you’ve built your rig, the final step is plugging into the house PA system at your church, school, or venue. The time-tested method is simple: place a microphone, like a Shure SM57, right in front of one of your cabinet’s best-sounding speakers. That signal goes to the main mixer, like an Allen & Heath Qu-24, where the sound engineer can blend your amazing stage tone into the main mix for the audience.
Ready to build your perfect rig? Explore our collection of versatile guitar amp cabinets and find the perfect voice for your amplifier at John Soto Music.
Wiring And Setup For Stage And Sanctuary
Alright, you’ve picked out the perfect amp head and cabinet. Now for the fun part: getting it all connected and ready to rock. Getting your wiring and placement right isn't just about sounding great—it's about protecting your gear from damage and making sure you can actually hear yourself on stage or during a worship service.
Think of it this way: getting the wiring wrong is like putting the wrong kind of fuel in a high-performance car. It’s a costly mistake. For your amp, the "fuel" is the impedance load from your cabinets, and you have two ways to connect multiple cabs: series and parallel. Knowing the difference is non-negotiable for the health of your amp.
This simple diagram shows where your cabinet fits into the signal chain. The signal flows from your amp head, into the cabinet which makes the sound, and then gets picked up by a mic to go to the main sound system.
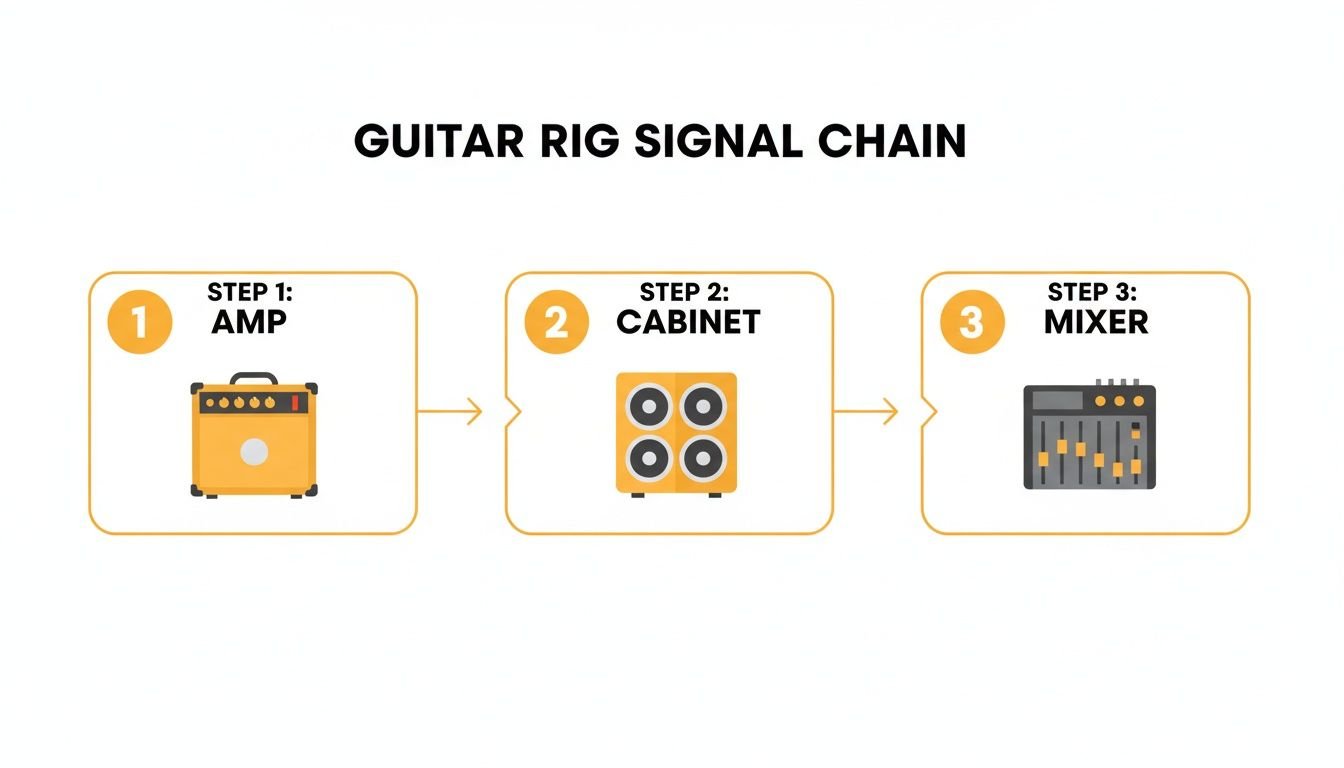
Your cabinet is the final voice for your tone on stage before it gets sent out to the audience. Let's make sure it's speaking correctly.
Series Versus Parallel Wiring
Here’s what you need to know: most modern amp heads with two speaker output jacks are wired in parallel internally. This is the setup you'll run into 99% of the time.
Parallel wiring is when you run two separate speaker cables from your amp’s two output jacks, one to each cabinet. This method decreases the total impedance. For example, plugging two 8-ohm cabinets into an amp this way creates a 4-ohm load. This is a very common setup for players who want to move more air.
On the other hand, series wiring increases the total impedance. If you connected those same two 8-ohm cabinets in series, you’d create a 16-ohm load. This is less common today but is essential knowledge if you're working with certain vintage amps or specific cabinet wiring mods.
Here's a breakdown to make it crystal clear.
Wiring Multiple Cabinets Series vs Parallel
| Wiring Type | How It Works | Impedance Calculation (Example with two 8Ω cabs) | Best Use Case |
|---|---|---|---|
| Parallel | Each cabinet connects directly to the amp's outputs. Most amps with two speaker jacks are internally parallel. | 4Ω Total. (R1 x R2) / (R1 + R2) | Safely matching an amp that has a 4-ohm output option, like many modern high-gain heads. |
| Series | The cabinets are connected in a "daisy-chain" loop: amp to cab 1, then cab 1 to cab 2. | 16Ω Total. R1 + R2 | Matching a vintage amp or a head with only a 16-ohm output when you're using two 8-ohm cabinets. |
On-Stage And Sanctuary Placement
How you wire your cab is only half the battle; where you put it is the other half. If your cabinet is blasting sound directly at your ankles, you’re not hearing the high-end frequencies. This almost always causes guitarists to turn up way too loud just to hear themselves.
- Angle Your Cab: The easiest fix is to use an amp stand or simply tilt your cabinet back. Point the speakers at your ears, not your knees. You'll be amazed at how much better you can hear yourself at a lower, more manageable volume.
- Avoid Feedback: Pay attention to where your cabinet is pointed in relation to your guitar's pickups. Aiming your cab away from where you're standing is a simple trick to cut down on that awful squealing and unwanted feedback.
For church worship teams, keeping stage volume under control is crucial for getting a clean mix for the congregation. A fantastic solution is an isolation box—a soundproofed enclosure that you put your cabinet and a microphone inside. This lets you crank your amp to get that sweet tube tone while sending a perfectly controlled signal to the soundboard.
Alternatively, you can run a direct line from your amp or modeler to the mixer and just use your cabinet as your personal monitor on stage.
With these setup and wiring tips, you can be confident your rig will sound its best and run safely in any environment. If you need the right speaker cables or amp stands to get your setup dialed in, you can find everything you need at John Soto Music.
Keeping Your Cabinet In Performance-Ready Condition
Your guitar amp cabinet is the voice of your entire rig. Think of it as an investment in your tone, and just like any critical piece of gear, it needs a little TLC to be ready for every gig, service, or rehearsal.
A few minutes of simple, routine maintenance is all it takes. This is the secret to reliability, and it can stop a tiny issue from becoming a show-stopping disaster right when you need your gear the most.
The Pre-Flight Checklist
Before every session, run through this quick inspection. It seriously takes less than a minute and can save you from a massive headache down the road.
- Check the Input Jack: Give the speaker cable a gentle wiggle right where it plugs into your cab. Does it feel loose? A wobbly or crackling jack is a classic sign of trouble and needs to be tightened or cleaned to stop your signal from cutting out.
- Listen for Rattles: Gently tap the side of the cabinet or give it a light shake. Any buzzing or rattling usually points to a loose screw, a vibrating handle, or even a speaker that needs to be snugged down.
- Examine the Grille Cloth: Take a quick look for any tears or rips. A damaged grille can't do its job, which is to protect your precious speakers from accidental pokes, spills, or worse.
Troubleshooting Common Cab Problems
Even with the best care, things can go wrong. Here’s how to diagnose and fix the most common cabinet issues right on the spot.
If you suddenly hear crackling or sputtering, it's almost always a dirty jack or a bad cable. The first and easiest step is to swap in a different speaker cable. If the noise is still there, a quick spray of contact cleaner into the input jack will often solve it instantly.
If you suddenly lose all your sound, don’t panic. Before you start thinking the worst, check your connections. Nine times out of ten, a "dead cab" is just a speaker cable that got kicked loose from the amp head or the cabinet itself.
When it's time to move your gear, always use padded covers. This is non-negotiable if you want to prevent dings, scratches, and damage to the tolex and grille cloth. For storage, keep your cabinet in a climate-controlled room—extreme changes in temperature or humidity can wreak havoc on the wood and electronics over time.
Need a reliable speaker cable or a protective cover for your guitar amp cabinets? Find all the essential accessories to keep your rig in top condition at John Soto Music.
Got Questions About Cabs? We've Got Answers.
The world of guitar cabs can feel like a maze of specs, speaker sizes, and wood types. It's easy to get lost. We hear the same questions pop up all the time from guitarists and sound techs, so we’ve put together some straight-to-the-point answers to help you get the sound you're looking for.
Can I Use a Bass Cabinet With a Guitar Amp?
Technically, you can. As long as your impedance and power handling are properly matched, you won't blow anything up. But should you? Probably not.
The tone will be worlds apart from what you expect. Bass speakers are built to handle a huge range of low frequencies, giving you a very deep, almost hi-fi sound. Guitar speakers, on the other hand, are all about that vocal, punchy midrange—that's where a guitar's character lives.
Plugging into a bass cab will likely give you a dark, woofy, and unfocused tone that just doesn't cut it for most guitar work. It’s a fine trick in an emergency, but you won't be getting the killer guitar tone you're chasing.
What Is the Difference Between Open-Back and Closed-Back Cabinets?
This is one of the biggest factors in a cab's sound, and it all comes down to how they throw sound into a room.
- Closed-Back Cabinets: These are your classic "wall of sound" cabs. The sealed back creates a tight, punchy, and very directional sound with a focused low-end thump. They're perfect for rock, metal, and any style where you need a powerful, in-your-face guitar tone that cuts right through the mix.
- Open-Back Cabinets: These let sound escape from the back, creating a much more open and airy feel. The sound spreads out and fills the room, giving you a three-dimensional quality that's fantastic for blues, jazz, and ambient or worship-style playing.
Think of it this way: a closed-back cab is like a spotlight, focusing all its energy forward. An open-back cab is like a lantern, spreading light in all directions.
How Much Does the Cabinet Wood Really Matter?
We see people get hung up on this a lot. While the wood—like birch versus pine—does make a subtle difference in the cabinet's resonance, it's far from the most important thing.
Frankly, build quality, internal bracing, and whether the cabinet is open or closed-back have a far greater impact on your final sound.
A rock-solid, well-braced cabinet made from high-quality plywood will almost always sound better than a flimsy cab made from some exotic "tonewood." Don't get lost in the weeds on the wood type. Focus on solid construction and the right cabinet design for your needs first.
Ready to find the answers to all your gear needs? At John Soto Music, we specialize in helping performers, churches, and schools build reliable, great-sounding systems. Explore our curated selection of road-ready guitar amp cabinets and let our team help you find the perfect voice for your rig.