Miking a drum kit really comes down to a few core ideas: choosing the right mics for each drum, placing them correctly to capture the best tone, and then using overheads to glue it all together into one cohesive sound. The whole process hinges on understanding that you're capturing one large instrument, not just a bunch of individual pieces. Getting this right is the first step toward a professional mix, and having the right gear makes all the difference.
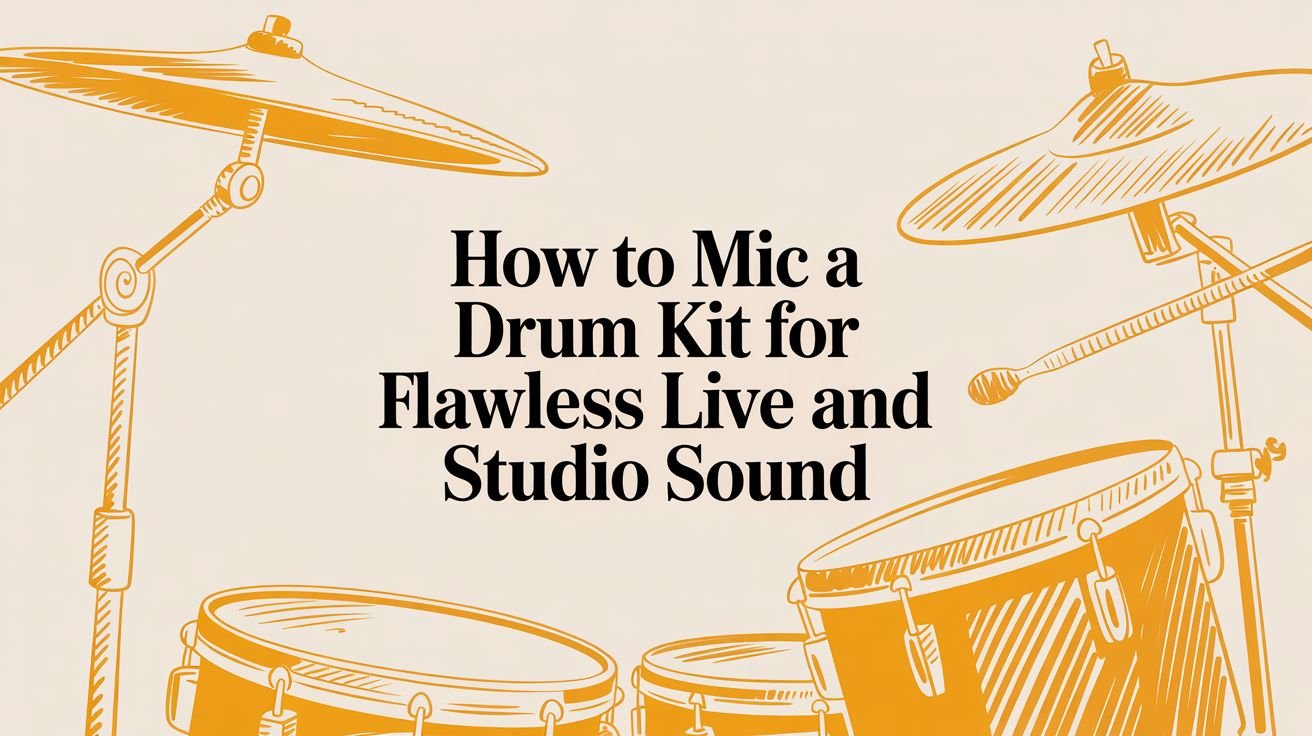
Your Foundation for Amazing Drum Sound

A powerful, clear drum sound starts long before you ever touch a fader or turn an EQ knob. Whether you're a church tech volunteer, a school band director, or a musician setting up for a gig, your initial approach is the most critical step. I’ve seen it time and time again: the secret to a professional mix is treating the drum kit as a single, cohesive instrument—not just a collection of separate pieces.
A great drum sound is built on respecting the role each component plays. The kick drum is the low-end punch, the very heartbeat of the song. The snare delivers that sharp, cracking backbeat. Cymbals add high-frequency shimmer and energy, while the toms provide those melodic and rhythmic fills. A one-size-fits-all miking approach just doesn't work because each element has a unique sonic job to do.
Why Your Mic Choice Matters
The microphones you choose are your first and most important tools. You'll mainly be working with two types when you mic a drum kit: dynamic and condenser mics. They serve very different purposes, and selecting the right one from the start will save you countless hours of mixing headaches.
- Dynamic Mics: These are the workhorses. They’re rugged and can handle incredibly high sound pressure levels (SPL), making them perfect for close-miking loud sources like a snare or toms. They really shine at capturing that mid-range punch and attack without getting overloaded or distorting.
- Condenser Mics: These are your detail mics. They’re more sensitive and articulate, which is exactly what you need for capturing the crisp, high-frequency "sizzle" of cymbals and the overall stereo image of the kit when used as overheads.
Practical Example: Putting a tough dynamic mic like a Shure SM57 on a snare will perfectly capture its sharp "crack," even when the drummer is hitting as hard as they can. Conversely, a pair of small-diaphragm condenser mics used as overheads will pick up the delicate sizzle of the hi-hats and the full, shimmering wash of the crash cymbals beautifully, details a dynamic mic would miss.
To make things easier, here’s a quick-reference table that breaks down the best mic type for each part of the kit. This will help you choose the right tools from our collection to build your ideal drum sound.
Quick Guide to Drum Microphone Selection
| Drum Component | Recommended Mic Type | Why It Works Best | Product Category Example |
|---|---|---|---|
| Kick Drum | Large-Diaphragm Dynamic | Handles high SPL, captures low-end punch and beater attack. | Boundary & Kick Drum Mics |
| Snare Drum | Small-Diaphragm Dynamic | Excels at capturing sharp, cracking mid-range transients. | Instrument Mics |
| Toms (Rack & Floor) | Small-Diaphragm Dynamic | Captures the body and attack of the tom without excessive cymbal bleed. | Instrument Mics |
| Overheads & Hi-Hat | Small/Large-Diaphragm Condenser | More sensitive to high frequencies, capturing cymbal shimmer and detail. | Condenser Mics |
This table isn't about rigid rules, but solid, time-tested recommendations. Getting the right tool for the job from the start saves you a ton of EQ headaches later on.
The most expensive gear in the world won't save a bad microphone placement. A well-placed, affordable mic will always outperform a poorly placed high-end one. Focus on fundamentals first.
Strategic Placement Over Expensive Gear
Ultimately, learning how to mic a drum kit is far more about technique than budget. Strategic placement is where you'll see the biggest improvements in your sound, period. A tiny adjustment of an inch or a slight change in angle can dramatically alter the tone, reduce bleed from other drums, and prevent common headaches like a muddy, undefined mix.
Thinking about placement right from the start sets you up for an easier, faster mixing process. It helps you avoid phase issues and ensures each microphone captures its intended source as cleanly as possible. This foundational knowledge is what allows you to make smart decisions that produce a powerful, balanced drum sound right from the source, saving you hours of troubleshooting down the road.
Choosing the Right Microphones for Each Drum
Picking the right tool for the job is the most important decision you'll make when learning how to mic a drum kit. It's just like a painter choosing different brushes for specific effects—your microphone choices will define the clarity, punch, and overall vibe of your drum sound.
Don't let building a mic locker intimidate you. It's really just about understanding what each drum needs and matching it with a microphone designed to deliver. A great set of mics is an investment that pays off every time you hit record or play a live show.
Workhorse Mics for Snare and Toms
For the high-impact sounds of the snare and toms, you need mics that can take a beating, both physically and sonically. This is where dynamic microphones absolutely own the stage. They’re built tough and can handle extremely high sound pressure levels (SPL) without distorting, which is why they're the undisputed king for close-miking drums.
A classic like the Shure SM57 or any similar dynamic instrument mic is the perfect starting point. Their rugged design and ability to grab that sharp, punchy mid-range make them a natural fit for the snare drum. When you place one just over the rim, it captures the "crack" of the stick and the body of the drum while doing a surprisingly good job of rejecting cymbal bleed from above.
- Practical Example: Angle an Instrument Mic at about 45 degrees toward the center of the snare head, roughly two inches above the rim. This spot gives you a fantastic balance of stick attack and shell tone. For toms, you can use the same type of mic, but aim it a bit more toward the center to capture more of that low-end boom.
Capturing the Kick Drum's Foundation
The kick drum is the heartbeat of your mix. It provides both the low-end "thump" you feel in your chest and the punchy "click" of the beater that helps it cut through everything else. To get this full spectrum, you really need a microphone specifically designed for the task: a large-diaphragm dynamic mic.
These kick drum mics are engineered from the ground up with a frequency response tailored for low frequencies. They can handle the intense blast of air from the drum's port without flinching, delivering a powerful, defined sound that needs way less EQ later on.
A dedicated kick drum mic is one of the best investments you can possibly make. It provides that low-end weight that generic mics just can't touch, and it will become the solid foundation for your entire mix.
To get that modern, punchy kick sound, a lot of engineers will place the mic just inside the soundhole, pointing right where the beater strikes the head. This trick captures the sharp attack of the beater, which is crucial for helping the kick slice through a busy mix. If you're after a boomier, more vintage tone, just pull the mic back a few inches from the soundhole to capture more of the shell's resonant tone.
- Practical Example: For a tight rock or pop sound, place one of our Boundary & Kick Drum Mics on a small stand and position it just inside the kick drum's resonant head port. Aim it directly at the beater for maximum attack. This setup ensures your kick drum is felt as much as it's heard.
Adding Detail with Condensers
While dynamic mics handle the brute force, condenser microphones are all about capturing detail, air, and nuance. Their sensitive design makes them perfect for picking up the high-frequency transients and delicate shimmer of cymbals, hi-hats, and the overall stereo image of the kit.
For overheads and hi-hats, small-diaphragm condensers—often called "pencil" mics—are a really popular choice. Their tight pickup pattern allows for very precise placement, and their crisp high-end response brings your cymbals to life without ever sounding harsh or brittle. Investing in a good pair of condensers will elevate your drum sound from good to professional.
- Practical Example: Place a pair of small-diaphragm Condenser Mics in an X/Y pattern about 3-4 feet above the snare drum. This setup gives you a clear, phase-coherent stereo image of the whole kit, capturing the cymbals beautifully while also helping to glue all the individual drum sounds together.
By matching the right microphone to each part of the kit, you’re setting yourself up for a clean, powerful, and professional sound right at the source. This thoughtful approach means you’ll spend less time fighting with EQ and more time mixing a great performance.
Practical Mic Placement for a Full Drum Kit
Alright, you've got the right mics. Now comes the fun part—actually putting them on the kit. This is where you move from theory to practice, turning a bunch of individual drums and cymbals into one cohesive, powerful instrument. Let's get hands-on with some repeatable techniques for a standard 5-piece kit.
The infographic below shows the general workflow I follow. You want to build your sound from the ground up, starting with the core of the beat.

We're building the sound from its rhythmic foundation—the kick and snare—before we add the cymbals and overheads to capture the full stereo picture.
Miking the Kick Drum for Punch and Body
The kick drum is the heartbeat of your mix. When you mic it, you're trying to capture two distinct sounds: the attack of the beater hitting the head and the resonant boom of the drum shell itself. This is a job for a dedicated Boundary & Kick Drum Mic.
- For Attack (The 'Click'): Put the mic just inside the port hole on the front head, pointing straight at where the beater makes contact. This position gives you that high-frequency "click" that helps the kick punch through a busy mix in rock, pop, or worship music.
- For Body (The 'Thump'): Pull the mic back so it's just outside the port hole, maybe 2-4 inches away from the resonant head. This captures more of the low-end warmth and tone from the shell, giving you that rounder, boomier sound you hear in jazz or soul.
Pro Tip: If you have the channels, use both. Put one mic inside for the attack and another outside for the body. Blending these two signals on your mixer gives you total control to sculpt the perfect kick sound for any song.
Capturing the Snare Drum's Crack and Sizzle
The snare is the centerpiece, the engine of the backbeat. Using two mics—one on top, one on the bottom—is the best way to get full control over its sound. A tough Instrument Mic, like the workhorse SM57, is exactly what you need here.
- Top Mic (The 'Crack'): Place the mic about 2 inches over the rim, angled down at roughly 45 degrees toward the center of the head. This spot captures the stick's impact—the "crack"—and the main tone of the drum. Just make sure it's out of the drummer's way!
- Bottom Mic (The 'Sizzle'): Get a second mic underneath the drum, pointing up at the snare wires. This mic is all about capturing that bright, fizzy "sizzle" from the wires themselves.
When you mix these together, remember to hit the polarity reverse switch (ø) on the bottom mic's channel. This ensures the two signals are in phase, reinforcing each other for a fat, punchy snare instead of a thin, hollow one.
Getting Punchy Toms with Minimal Bleed
Toms add the melodic muscle to drum fills. Your goal here is to get a clean, punchy tone while rejecting as much of the cymbal wash as possible. This is another job for a good set of dynamic mics.
The starting placement is a lot like the snare. Position the mic 2-3 inches above the rim, pointing at the center of the head. The real secret, though, is in the angle.
- Angle for isolation: Instead of a 45-degree angle, try a much steeper one, almost parallel to the tom head. By doing this, you place the cymbals way off-axis to the microphone's pickup pattern, which naturally rejects a ton of that bleed. This one trick can clean up your mix in a huge way.
- Placement for tone: If you want more stick attack, aim the mic closer to the center. For a warmer, more resonant sound, aim it a bit more toward the edge.
Careful angling means you get focused tom sounds that don't need a ton of EQ or gating at the console.
A Brief History of Drum Miking
While we often throw a mic on every drum today, it wasn't always this way. In the early 1960s, it wasn't uncommon for an engineer like Norman Smith to record the entire Beatles kit at EMI Studios with just two mics—a single overhead and one on the kick. By the 70s, three-mic setups were becoming standard, and now it's normal to see 4-8 mics on a single kit. This evolution from minimalism to multi-miking shows how much both technology and our taste for drum sounds have changed. To learn more, check out this great article on the evolution of drum recording on RecordingMag.com.
Mastering Overhead and Room Miking Techniques

If your close mics are the individual voices in a choir, then your overhead mics are the sound of the entire choir singing together. This is your secret weapon for creating a cohesive, professional drum sound that feels like a single instrument, not just a collection of hits. Overheads capture the overall stereo image and glue the punch of the kick and snare to the shimmer of the cymbals.
Learning to mic a drum kit properly means you have to move beyond just individual drums and start thinking about the big picture. It's the overheads and room mics that transform a bunch of percussive sounds into a unified instrument that breathes with the music. For this critical job, you'll need a good pair of Condenser Mics to capture all the necessary detail and high-frequency information.
The Spaced Pair for a Wide Stereo Image
One of the most common and effective overhead techniques is the Spaced Pair. This is exactly what it sounds like: you place two condenser mics on either side of the kit, making sure they are perfectly equidistant from the center of the snare drum. The whole point is to create a wide, panoramic stereo image that makes the drum kit feel massive in the mix.
This technique is fantastic for rock, pop, and modern worship music where you want the drums to fill out the sonic space. The biggest challenge here, however, is phase cancellation. Because the mics are far apart, sound from the snare and kick will arrive at each one at slightly different times. If you're not careful, this can lead to a thin, hollow sound.
- Practical Example: Grab two condenser mics on tall boom stands. Position one over the hi-hat and ride area, and the other over the floor tom and crash area.
- The critical step: Use a mic cable or a tape measure. Run it from the center of the snare drum to the capsule of the left microphone. Now, use that exact same measurement to position the right microphone. This simple step is what keeps your center image (kick and snare) solid and punchy.
The XY Setup for a Focused, Coherent Sound
If you’re worried about phase issues or just need a tighter, more focused drum sound, the XY technique is your best friend. This "coincident pair" method involves placing two cardioid condenser mics with their capsules as close together as possible, angled at 90 degrees to each other.
Because the capsules are practically at the same point in space, sound from anywhere on the kit hits both mics at the exact same time. This completely eliminates phase problems. The trade-off is a narrower stereo image, but the payoff is a tight, phase-coherent sound that's perfect for smaller rooms, live gigs where bleed is an issue, or genres like funk and R&B that demand a focused center.
The XY technique gives you a nearly perfect mono-compatible stereo image. This means if your mix ever gets played on a mono system (like some club PAs or a small Bluetooth speaker), your drum sound won't fall apart.
The Legendary Glyn Johns Method
Looking for a natural, punchy, and surprisingly full sound with minimal mics? The Glyn Johns method is a legendary technique for a reason. Developed back in the 1970s, it's a masterclass in how precise placement can create a massive drum sound with just two overheads (plus your kick and snare mics, of course). This approach is all about geometric accuracy.
The first overhead goes 3 to 4 feet directly above the snare. The second "overhead" is placed much lower, just over the floor tom, looking across the tom at the hi-hat. Here's the magic: this second mic must be the exact same distance from the snare as the first one, which guarantees perfect phase coherence. It's so critical that engineers will physically use a mic cable to measure from the snare's center to each mic capsule. It's estimated that roughly 40-50% of studios still use some version of this method. You can learn more about this classic technique in this detailed guide on RecordingRevolution.com.
Adding Room Mics for Epic Ambiance
Ever wonder how to get that massive, "arena rock" drum sound? The secret isn't just in the close mics; it's in the room mics. A single condenser mic (or a stereo pair) placed several feet away from the kit captures the natural reverb and life of the space you're in.
- Practical Example: A great starting point is to place a large-diaphragm condenser mic about 10-15 feet in front of the kit, maybe 4-5 feet off the ground.
- Mixing Tip: In your mix, get your close mics and overheads sounding good first. Then, slowly blend in the room mic signal underneath everything. Try compressing the room mic fairly hard—this will make the ambiance "breathe" and add a huge sense of space and power to your drum mix. This one channel can be the difference between a good drum sound and an truly epic one.
Bringing It All Together on the Mixer
Alright, you’ve done the hard work on stage. The mics are set, the cables are run, and now it’s time to head over to the console and make those drums sing. This is where we take all those individual drum sounds and transform them into a cohesive, powerful drum mix.
The entire process hinges on one critical first step: getting clean, healthy levels for every single microphone. We call this gain staging.
Setting Clean Levels with Gain Staging
So, what is gain staging? It's simply the process of setting the input level for each mic channel. You want it loud enough to be crystal clear, but not so loud that it distorts or "clips." Getting this right is the absolute foundation for a clean mix. It's what prevents that nasty digital distortion that can completely ruin a track or a live performance.
On a modern digital mixer like an Allen & Heath CQ series, this is incredibly straightforward.
Start by asking your drummer to play the kick drum at the loudest they expect to play during the performance. As they're hitting it, slowly turn up the gain knob for that kick channel. You'll want to watch the meter—your goal is to have it consistently peaking in the yellow, maybe just barely touching the red on the absolute hardest hits.
- Your Target: Aim for the signal to be hovering around -18 to -12 dBFS on your meter. This is the sweet spot.
- The Big "No-No": Whatever you do, don't let the signal live in the red. A clipped input is distorted forever. No amount of mixing magic can bring it back.
- Rinse and Repeat: Now, do this for every single drum mic you have set up—snare, toms, hi-hat, and both overheads.
This process guarantees that your mixer is receiving the best possible signal from the start, giving you plenty of headroom to work your magic with EQ, compression, and effects down the line.
Checking and Correcting Phase
Phase issues are the invisible enemy of a punchy, fat drum sound. It's what happens when two mics capture the same sound source (like a snare drum) at slightly different times. This time difference causes certain frequencies to cancel each other out, leaving your drums sounding thin, weak, and hollow. This is a super common problem with top and bottom snare mics or spaced-pair overheads.
Thankfully, the fix is usually just a button press away.
First, bring up the faders for your top and bottom snare mics to an equal level. Ask the drummer to hit the snare repeatedly. Now, find the polarity invert switch on the bottom snare mic's channel—it's often labeled with a "ø" symbol—and press it.
Listen closely as you flip that switch on and off. One position will sound thin and almost hollow. The other will suddenly sound full, deep, and punchy. That fuller, punchier sound is what you're after. Your mics are now in phase.
You can use this same listening test on your overheads to make sure the kick and snare feel centered and solid in the stereo image. It's a simple, two-second check that can make a massive difference in the final impact of your drum mix.
Managing Drum Bleed with Gates and EQ
Let's be real—drum bleed is unavoidable. The snare mic is always going to pick up the hi-hat, and the tom mics will always hear the cymbals. A little bit of this bleed can actually sound natural and glue the kit together. Too much, however, and your mix will turn into an undefined, messy wash of sound.
Two of your best friends for taming bleed are gates and EQ.
A noise gate is basically an automatic mute switch. You set a volume level (the threshold), and any sound that's quieter than that level gets turned off. For example, you can put a gate on a tom mic so it only "opens" and lets sound pass through when the drummer actually hits that specific tom.
- Practical Example: Adjust the threshold so the gate opens reliably every time the tom is hit but stays shut when the nearby cymbals are played.
- Adjusting Attack & Release: You’ll want a fast attack so you don't cut off the initial crack of the tom hit. A short release will close the gate quickly after the tom's natural decay, cleanly cutting off any cymbal bleed that follows.
You can also use some strategic EQ to help out. A simple high-pass filter on your tom mics can work wonders to roll off the low-end rumble from the kick drum. Similarly, a gentle cut in the very high frequencies on a snare mic can reduce some of the harshness from the hi-hat bleed without making the snare sound dull.
The goal isn't to eliminate all bleed, but to control it. You want to tighten up the sound without making it sound robotic or unnatural. By combining careful gain staging, proper phase alignment, and smart bleed management, you'll be well on your way to a clean, impactful drum sound that sits perfectly in any mix.
Your Drum Miking Questions Answered
Even with the best techniques, there are always a few specific challenges that pop up when you're miking a drum kit. Let's tackle some of the most common questions we hear from church sound teams, students, and gigging musicians, with clear, practical answers to help you troubleshoot in the real world.
How Many Mics Do I Absolutely Need for a Good Live Sound?
Honestly, it really depends on the room and what you're trying to accomplish. For smaller venues like a coffee shop or an intimate church service, you can get a fantastic sound with just two or three microphones.
A kick drum mic is almost always a must-have for that low-end punch and foundation. From there, one or two overheads can capture the overall feel and stereo image of the rest of the kit.
A popular and incredibly effective 3-mic setup is:
- Kick: To capture the fundamental punch.
- Snare: To define the crucial backbeat.
- Single Overhead: To glue the cymbals and toms together.
If your budget is really tight, even just a kick mic and a single, well-placed condenser in front of the kit will make a world of difference compared to letting the drums go completely unmiked. Investing in these three core mics from our collection is the fastest way to a professional live drum sound.
What Is Phase Cancellation and How Do I Fix It?
Phase cancellation is that frustrating thing that happens when two mics capture the same sound at slightly different times. The sound waves literally fight each other, resulting in a thin, hollow, and weak sound that robs your drums of their power. You'll run into this a lot with top/bottom snare miking or when using spaced-pair overheads.
The fix is usually a simple button press on your digital mixer. Look for the 'polarity invert' button (often labeled with a 'ø' symbol) on one of the channels in question. For your snare, flip the polarity on the bottom mic and listen. The setting that sounds fuller with more low-end is the right one.
While this is an easy fix, the best strategy is always prevention. Using phase-coherent techniques from the start, like an XY pattern for your overheads, can help you dodge the problem altogether.
My Cymbals Are Too Loud! How Can I Control Them?
This is a classic problem, especially in live settings where stage volume can get out of hand. Your first move should always be to talk to the drummer. A quick conversation asking them to adjust their playing dynamics to better fit the room can solve the issue before you ever touch a knob.
From a technical standpoint, your best tool is microphone placement. Try lowering your overhead mics and pointing them more toward the toms and snare. This captures less of that direct, harsh cymbal wash. Using cardioid pattern mics for your overheads is also key, as they naturally reject sound from the sides and rear.
On the mixer, a gentle EQ cut in the harsh frequencies (usually around 4-8 kHz) on the overhead channels can help. If you're still fighting it, a de-esser or a multi-band compressor can work wonders to tame those piercing cymbal hits without messing up the rest of the drum mix.
Ready to build a reliable, great-sounding drum miking setup? At John Soto Music, we offer a curated selection of road-ready microphones, digital mixers, and all the accessories you need to achieve flawless sound for your church, school, or stage. Explore our microphone categories and build your perfect system today.

