Getting your in-ear monitor mix right is absolutely essential for a confident performance. At its core, figuring out how to set up in ear monitors is straightforward: you'll send audio from your mixer to a transmitter or headphone amp, which then feeds a receiver pack you wear, and finally, you plug in your earpieces. This simple chain is what takes stage sound from a chaotic mess to a controlled, personal experience.
Your Essential Guide to Flawless In-Ear Monitor Setup
Making the jump from loud, muddy floor wedges to crystal-clear in-ear monitors is a genuine game-changer. It doesn’t matter if you're a musician on a touring stage, a worship leader guiding your congregation, or a sound tech dialing in a studio session—a solid IEM setup is the key to a professional performance.
A great IEM mix lets you hear yourself with incredible clarity, protects your ears from damaging stage volumes, and even helps your sound engineer create a cleaner front-of-house mix for the audience. It’s a win-win-win.
This guide will demystify the whole process. We’ll cover everything from picking the right gear at John Soto Music—like a dependable Allen & Heath mixer or a pro-level Shure PSM300 IEM system—to dialing in that personal mix that makes you feel unstoppable.
Why IEMs Are the New Standard
For modern live sound, setting up in-ear monitors has become non-negotiable. This is especially true in churches and for worship teams where vocal clarity is everything. A clean, articulate monitor mix kills feedback and gives singers and musicians the confidence to perform at their best.
The numbers back this up. The global IEM market was valued at USD 0.845 billion in 2023 and is only expected to grow as more venues get on board. With wireless systems now holding a 55% market share, the freedom performers love is becoming the norm. For our clients, a proper IEM setup means reliable, consistent sound night after night, even in a 500+ attendee sanctuary. You can explore more data on the growing IEM market and see its impact on live events for yourself.
A great IEM mix isn't about being loud; it's about being clear. The goal is to remove distractions so you can focus entirely on your performance, confident that what you hear is accurate and inspiring.
This whole shift isn't just about sound quality—it’s about taking back control. With IEMs, you're no longer fighting the acoustics of the room. You're creating your own personal audio world that works perfectly for you.
Before we get into the nuts and bolts of connecting everything, it’s helpful to understand the two main routes you can take: wired or wireless. The table below gives you a quick snapshot of the differences to help you decide which path is right for your situation.
Wired vs Wireless IEMs Quick Setup Comparison
Here's a high-level look at how wired and wireless IEM setups stack up against each other. This will help you quickly see the pros and cons of each approach when you're just getting started.
| Aspect | Wired IEM System | Wireless IEM System |
|---|---|---|
| Best For | Stationary performers (drummers, keyboardists), budget-conscious setups, small stages. | Active performers (vocalists, guitarists), larger stages, professional touring. |
| Initial Setup | Simpler. Connect a headphone amp to a mixer's aux output, run a cable to your ears. | More involved. Requires setting up transmitters, finding clear frequencies, and syncing receivers. |
| Key Pro | Rock-solid reliability, no signal dropouts or interference. Lower cost. | Complete freedom of movement on stage. |
| Key Con | You're tethered by a cable, which can be restrictive and messy. | Higher cost, potential for RF interference if not set up correctly. |
Ultimately, both wired and wireless systems can deliver incredible sound. The best choice really comes down to your budget, your role on stage, and how much freedom of movement you need to perform your best.
Assembling Your Complete IEM Toolkit
Building a reliable in-ear monitor rig is about choosing the right pieces that work together. It's not just a random shopping list; it's about understanding how each component contributes to clear, dependable sound for your musicians.
At the core, every IEM setup needs a way to get the mix from the soundboard to the performer. For wireless, that's a transmitter and a bodypack receiver. For a wired setup, it's a dedicated headphone amplifier. Let's break down what you need for both paths.
The choices you make here will define your entire monitoring experience on stage.
The Core Components: Wireless and Wired Systems
For any wireless setup, the heart of the system is a transmitter paired with a bodypack receiver. The transmitter, usually a half-rack box, lives at the sound booth or in a stage rack. It takes the monitor mix from an auxiliary output on your mixer and broadcasts it as a radio frequency (RF) signal.
The performer wears the bodypack receiver, a small pack clipped to a belt or guitar strap. This pack catches the RF signal and turns it back into audio for your earpieces. When you're picking a receiver, focus on two things: durability and battery life. Live music is tough on gear, and the last thing you want is your mix dying mid-song. Always, always have spare AA batteries ready to go.
For a wired setup, the central piece is a headphone amplifier. This could be a simple, tough-as-nails belt-pack like the Behringer P1 or a more advanced personal mixing station.
Practical Example (Wireless): A vocalist at church is using an Allen & Heath CQ-18T mixer. The sound tech creates their monitor mix and sends it from an aux out to a Shure PSM300 transmitter. The vocalist clips on the matching P3R bodypack, plugs in their IEMs, and has total freedom to move across the stage.
Practical Example (Wired): A drummer on a Midas M32 mixer gets their mix sent over a single ethernet cable to a Behringer P16-M personal mixer. This is a game-changer. They can tweak their own mix—more kick, less guitar—without ever having to flag down the sound engineer. Their IEMs plug right into the P16-M, giving them a bulletproof, interference-free connection.
We carry all the solutions mentioned here, from Allen & Heath mixers to Behringer personal mixers, right here at John Soto Music.
Earpieces: The Most Personal Choice
Your earpieces, or IEMs, are the last—and most personal—link in the chain. They dictate your sound quality, how comfortable you are for a long set, and most importantly, how much you can isolate yourself from loud stage noise. You've got two main routes: universal-fit or custom-molded.
Universal-fit IEMs are a great place to start. They come with a variety of silicone and foam tips so you can find a snug fit. Models like the Westone Audio Mach 20 provide fantastic audio quality right out of the box. The secret is to spend time trying all the included tips to find the one that creates the best seal in your ear.
Custom-molded IEMs are the ultimate upgrade. An audiologist takes an impression of your ear canals, and the earpieces are built to fit you perfectly. This perfect fit provides unmatched comfort and the best noise isolation possible, often cutting stage volume by 26-30dB. With that kind of isolation, you can turn your pack down to a safer volume and still hear every nuance of your mix.
Investing in custom molds is one of the single biggest upgrades you can make to your monitoring experience. The perfect seal not only protects your hearing but dramatically improves the low-end response and clarity of your mix.
Don't Forget the Essentials
A few other pieces of gear are absolutely critical for making your rig professional and reliable. Don't overlook them.
- High-Quality Cables: This is not the place to save a few bucks. A cheap cable will eventually fail, and it will always be at the worst possible moment. Use good, balanced XLR or TRS cables to connect your mixer to your transmitters or headphone amps.
- Rack Mounts: If you're running multiple wireless IEM systems, a rack mount kit is a no-brainer. It keeps all your transmitters neat, secure, and looking professional in a rack case.
- Antenna Combiners: If your band has three or more wireless IEM systems, an antenna combiner is essential. Instead of having a "forest" of antennas all competing with each other and creating RF chaos, a combiner lets you use one single, high-quality antenna for all your transmitters. This cleans up your RF signal dramatically and is the pro way to avoid dropouts.
By putting thought into each of these components, you’re not just buying gear. You’re building a solid, trustworthy system that gives you the confidence to perform at your best.
How to Connect Your IEM System
Alright, you've got your gear ready to go. The next, and arguably most important, step is getting everything plugged in correctly. This is all about understanding the signal path—the journey your audio takes from the mixing board all the way to your ears. Don't worry, we'll keep it simple and map out exactly how to connect both wired and wireless systems.
Think of your mixing console as the heart of the operation. Every microphone and instrument plugs into it, and from there, you, the sound engineer, get to decide what each musician hears. The magic happens using the mixer's auxiliary (aux) sends.
The Wireless Connection Path
For a wireless setup, the signal flow is beautifully simple: Mixer -> Transmitter -> Bodypack Receiver -> Earpieces. Your main goal here is to send a clean, strong audio signal from your console to the wireless transmitter without adding any unwanted noise or distortion.
Let's walk through a common scenario. Imagine your worship leader needs a wireless in-ear mix from an Allen & Heath Qu-16 digital mixer. Here’s how you'd hook it up:
- Grab a balanced XLR or TRS cable and connect an aux output on the mixer (let's say "Mix 1") to the input on your wireless transmitter, like a Shure PSM300.
- Power on both the transmitter and the receiver bodypack.
- On the receiver, run a frequency scan to find a clean, open channel in the room. Once it finds one, you just sync the transmitter to match it.
That's it. That simple connection is the foundation of your entire wireless monitor world.
This diagram shows the basic journey your audio will take in a wireless IEM rig.
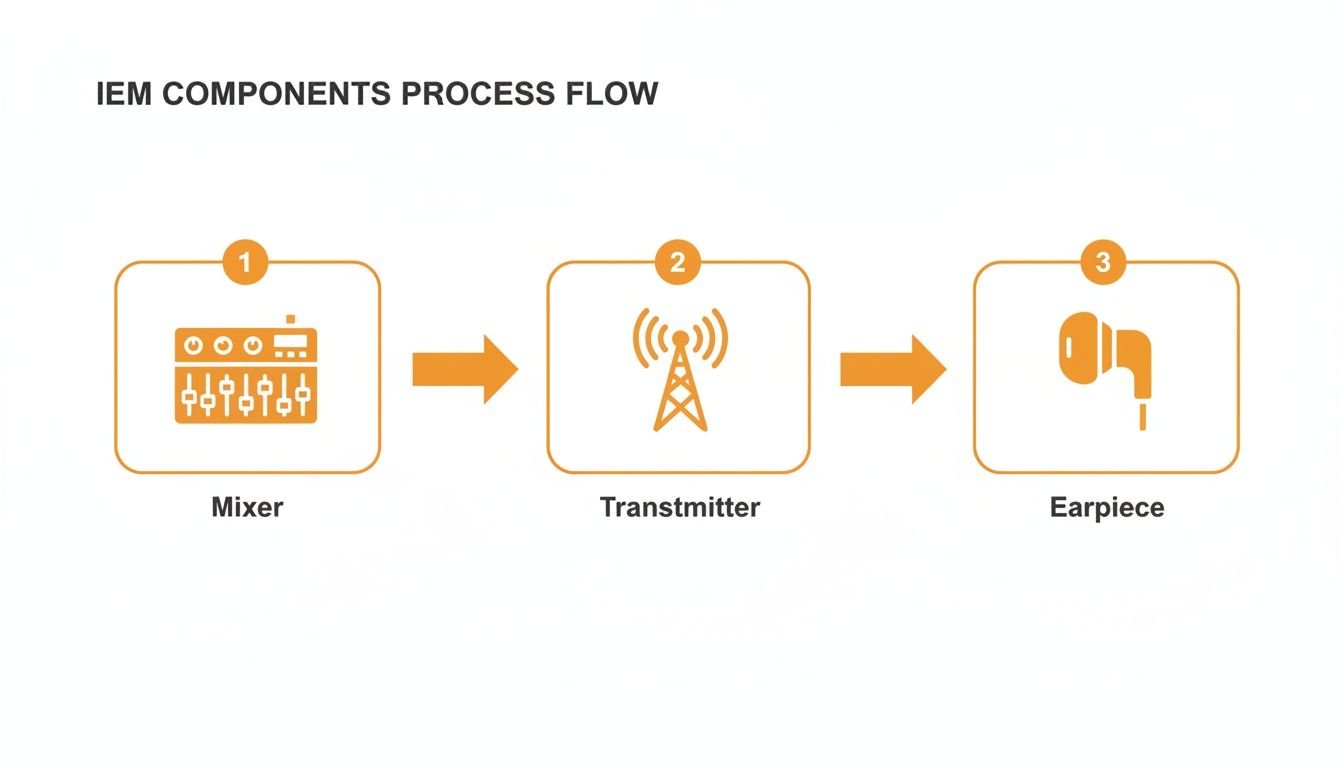
As you can see, the signal starts at the mixer, gets broadcast by the transmitter, and finally lands in your earpieces, completing the circuit.
For live sound engineers, especially at schools or events, the first job is always frequency coordination. This is non-negotiable, as spectrum congestion now impacts 50% of U.S. venues. After plugging the transmitter into a dedicated aux on your mixer (like on an Allen & Heath SQ), you'll match your levels, aiming for peaks around 0VU. Syncing the receiver via IR is key to avoiding the dropouts that plagued 20% of early wireless rigs but are now under 5% with modern tech. You can read the full research about the professional monitor market to see how far the technology has come.
Setting Your Gain Structure Correctly
One of the most critical parts of this whole process is managing your gain structure. If you get this wrong, your mix will either be too quiet and full of hiss, or way too loud and distorted.
Your goal is to send a healthy, solid signal from the mixer to the transmitter without it ever clipping. Look at the output meters for your aux send. You want to see the signal peaking consistently around -6dB to 0VU. This gives you a strong signal that will overcome any system noise but leaves enough headroom to avoid nasty digital clipping.
Pro Tip: Whatever you do, don't let your aux send meter hit the red. Red means clipping, and once you send that distorted signal to the transmitter, there's no way to fix it. It's always better to run the signal a little cooler and just turn up the volume knob on the bodypack.
The Wired Connection Path
For musicians who don't move around much—like drummers, keyboard players, or percussionists—a wired IEM system is a rock-solid, interference-free solution. The signal path is even more direct: Mixer -> Headphone Amplifier -> Earpieces.
There are a couple of popular ways to do this:
- Direct from the Mixer: The simplest method is running a cable from an aux send on your board straight into a small headphone amp like the Behringer P1. The musician just clips the amp to their belt or waistband and has a big, easy-to-use volume knob.
- Personal Mixing Hub: A more powerful setup involves a personal mixing system like the Behringer P16-I. This hub takes multiple channels from your main mixer (say, a Midas M32) and sends them all down a single ethernet cable to a personal mixer on stage, the P16-M. This gives the musician total control over their own mix.
For a drummer, this is a game-changer. They can independently turn up the click track, add more bass for the pocket, and dial back the vocals without ever having to wave down the sound engineer. At John Soto Music, we help countless churches and bands set up these personal mixing systems for this exact reason.
Mono vs. Stereo Mixes Explained
The final decision you need to make is whether to run your mixes in mono or stereo.
- A mono mix sends the exact same audio signal to both your left and right ears. It’s simple and only requires one aux send from the mixer.
- A stereo mix sends different signals to your left and right ears, which creates a more realistic sense of space. This takes up two aux sends from your mixer (e.g., Aux 1 and Aux 2) that you'll pan hard left and right.
While mono gets the job done, a stereo mix provides a far more natural and clear listening experience. It allows the engineer (or the musician with a personal mixer) to pan instruments across the stereo field—maybe guitar a little left, keys a bit to the right, and vocals right down the middle. This separation makes it dramatically easier to pick out individual parts in a busy mix and seriously reduces listening fatigue over a long set or service.
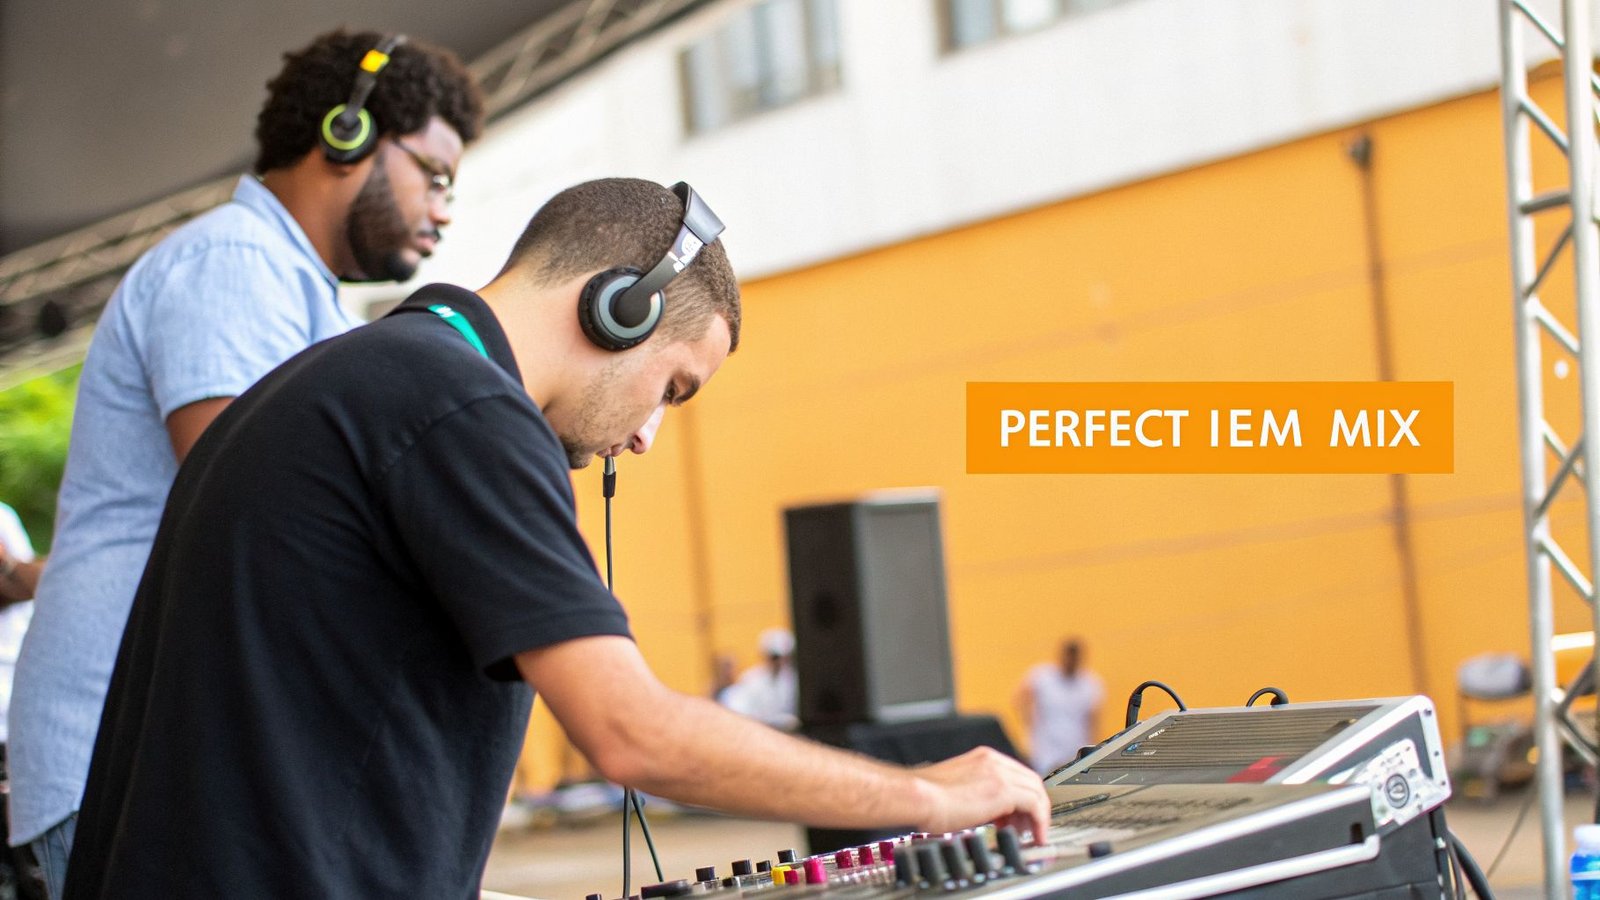
Crafting Your Perfect Personal Mix
Once you’ve got all the gear wired up and humming, the real work begins. The technical setup is one thing, but building a mix that actually helps you play or sing better? That’s an art form. A great IEM mix isn't about hearing everything—it's about hearing the right things at the right time.
It all starts with a simple rule that every musician on in-ears needs to live by: more me. This is your anchor, the foundation of your entire performance. Before you worry about anyone else, you need to hear yourself.
Start With The 'More Me' Principle
Seriously. The first thing you should do when building your mix is to bring up your own channel and nothing else. Get your voice or instrument to a solid, comfortable level where you feel completely connected to what you're doing. Everything else is just supporting cast.
Pro Tip: Start your mix with just your channel. Then, slowly add only the essential elements you need to lock in with the band. A cluttered IEM mix is a one-way ticket to a confusing performance.
Once you have your own signal dialed in, you can start layering in the other parts of the band. The goal here is surgical precision, not a wall of sound. You’re building the simplest, leanest mix that gives you what you need for pitch, timing, and confidence.
Mixing Templates for Different Musicians
Every person on stage has a different job, and their mix should reflect that. What a drummer needs is a world away from what a lead vocalist requires. These are just starting points, but they come from years of seeing what works.
For Vocalists:
Your job is to deliver the melody and the message, so your voice has to be king. After that, it’s all about pitch and rhythm.
- Your Vocal: Loud, proud, and right down the middle. This is non-negotiable.
- Primary Chordal Instrument: The piano or acoustic guitar that’s outlining the harmony.
- Kick and Snare: This is your rhythmic bedrock. Don't add all the cymbals and toms—just the core beat.
- Lead Vocal/Instrument: To catch cues for entrances and harmonies.
- A Touch of Reverb: This is critical. A bone-dry vocal in your ears feels unnatural and can make you feel isolated. A little 'verb goes a long way.
For Drummers and Bassists:
You two are the engine room. Your job is to lock in so tightly that you sound like one person.
- Kick and Bass: These should be the loudest things in your mix. Period.
- Click Track/Metronome: If you use one, it needs to be clear and present.
- Snare Drum: To nail the backbeat.
- Lead Vocal: For following song structure and arrangement cues.
- Rhythm Guitar/Keys: Just enough to hear the chord changes and any rhythmic pushes.
For Guitarists and Keyboardists:
You need to hear your own tone and parts clearly, but also sit perfectly in the pocket of the rhythm section.
- Your Instrument: This is your main focus. If you run a stereo rig, try panning your channels a little bit left and right to create a wider, more defined space for yourself.
- Kick, Snare, and Bass: You need to feel the groove.
- Lead Vocal: Your guide for song form and cues.
- Other Chordal Instruments: Blend them in just enough to stay out of their way, but know what they’re doing.
Remember, these are just templates. The real key is to experiment. Find the absolute minimum you need to play with confidence.
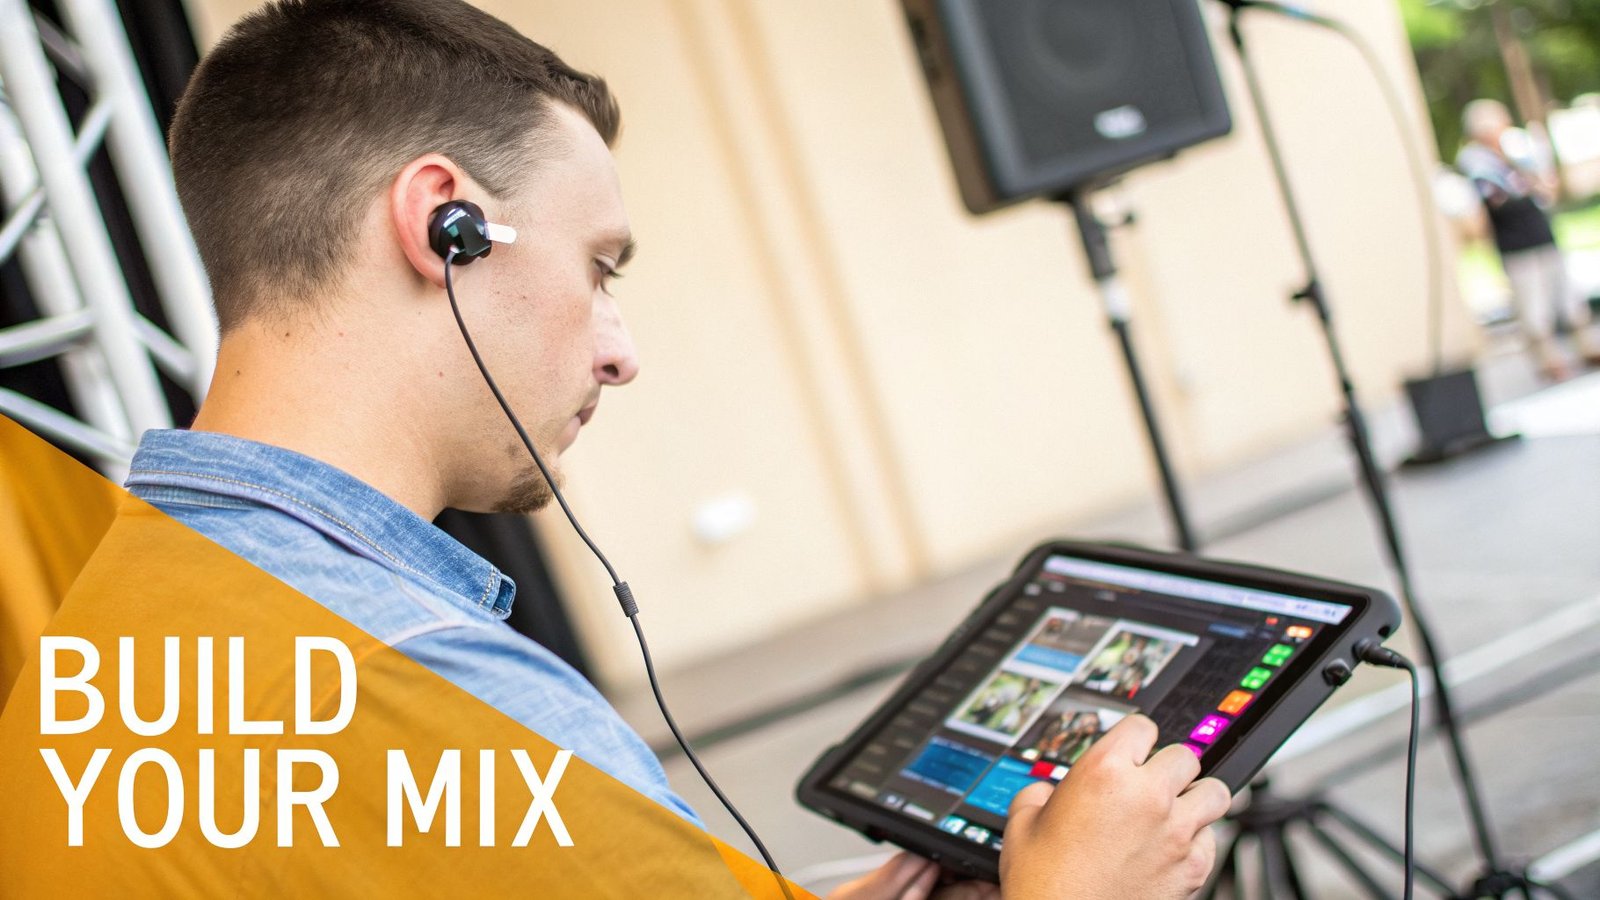
Taking Control with Personal Mixing Apps
One of the biggest game-changers for live music, especially in churches, has been the rise of personal mixing apps. This technology empowers musicians to control their own monitor mix from a smartphone or tablet, taking a huge load off the sound engineer.
Mixers like the Allen & Heath Qu series with its Qu-You app are a perfect example. Instead of a singer waving frantically at the sound booth for "more reverb," they can simply pull out their phone and adjust it themselves. The bass player needs more kick? A few taps on the screen and it’s done.
This isn’t just a convenience; it leads to better performances. When musicians have control, they get exactly what they need, the moment they need it. It’s no surprise the demand for this precision is pushing the IEM market, which is projected to hit USD 595.1 million by 2032.
For wired setups, I often route a direct out from a Midas M32 to a splitter for rock-solid, latency-free monitoring. A little trick pros use is a slight 1-2kHz boost on vocals for extra clarity, while cutting some of the 200-500Hz mud that affects an estimated 40% of untreated rooms. A well-balanced mix—say, 50% lead vocal, 30% effects, and 20% ambient room mics—can reduce fatigue and allow for 25% longer practice or performance sessions. You can learn more about IEM market findings and the tech making this possible.
Finding your perfect mix is a journey. Start simple, put yourself first, and only add what you truly need to play your best.
Avoiding Wireless Dropouts and Static
Wireless IEMs give your performers incredible freedom on stage, but that freedom comes with a trade-off. You're now in charge of managing your own radio frequency (RF) environment. A clean, stable signal is what separates a confident performance from a nightmare of static and dropouts.
Getting this right is all about achieving rock-solid wireless performance, every single time.
Mastering the wireless side of how to set up in ear monitors boils down to finding clean airwaves for your signal. This process, called RF coordination, sounds technical, but modern IEM systems have made it surprisingly straightforward.
Let Your Gear Find a Clean Frequency for You
Your best tool for avoiding interference is already built into your bodypack receiver. Nearly every professional wireless system, like the workhorse Shure PSM300, includes a scanning function. Think of it as a little detective sniffing out all the other radio signals floating around the venue.
Instead of just picking a frequency and hoping for the best—a recipe for disaster—you can get a clear picture of the RF landscape. Here’s the real-world process I use every single time.
First, make sure all your IEM transmitters are turned off. You want the receiver to scan the room, not its own signal. This is a critical first step many people miss.
Next, fire up the scan function on your bodypack. Let it run its course. The receiver will search for and identify the cleanest, most open frequency group it can find.
Finally, once the receiver has locked onto a clean channel, turn on its matching transmitter. Use the system's sync function (usually an IR window you hold the packs up to) to instantly send that clean frequency from the receiver back to the transmitter. That's it. This whole process takes less than a minute and prevents 90% of wireless issues before they start.
Antenna Placement is Everything
Your antennas are the physical bridge between the transmitter and the receiver. Where you put them has a massive impact on your signal's health. The golden rule is to maintain line of sight between the transmitter's antenna and the performer wearing the bodypack.
Don't bury your transmitters in a metal rack tucked away under the stage. That's like trying to talk to someone from another room with the door closed. Get your antennas up, out in the open, and in a position where they can "see" the performers.
If you're running three or more wireless systems, just using the individual "whip" antennas creates a messy "antenna farm." These competing signals can cause a nasty type of interference called intermodulation. This is where an antenna combiner becomes a non-negotiable piece of gear. A combiner, like the Shure PA411, takes the feeds from multiple transmitters and sends them out through a single, properly placed antenna. This is the professional standard and dramatically cleans up your RF world. You can find these at John Soto Music.
Quick Wireless Troubleshooting Checklist
Even with a perfect setup, problems can pop up. When you hear that dreaded static or experience a dropout, don't panic. Run through this quick checklist.
Problem: You're hearing sudden static or a "hissing" sound.
- Check Your Squelch: The squelch setting mutes your receiver when the signal gets too weak, preventing noise. If it’s set too low, it can let static through. Try nudging it up a bit.
- Rescan, Rescan, Rescan: A frequency that was wide open during soundcheck might have been taken over by the venue's Wi-Fi or another wireless device. Your first move should always be to run a new frequency scan.
Problem: The signal keeps dropping out completely.
- Check Line of Sight: Did the worship leader walk behind a large column or a metal set piece? Remind performers of where they have coverage.
- Check the Batteries: Weak batteries are the #1 cause of poor wireless performance. Always, always start a service or show with a fresh set of high-quality AA batteries.
Problem: The performer has very poor range.
- Look at Your Antennas: Is the transmitter's antenna behind the rack or pressed against a wall? Get it up higher and into the open air.
- Are You Using a Combiner? If you have three or more systems and no antenna combiner, you are creating your own interference. That's the most likely culprit for poor range in a multi-channel setup.
By making these practices a habit, you can turn your wireless IEM system into a reliable tool that builds confidence, rather than a constant source of stress.
We Get These Questions All The Time
Even after you’ve got everything plugged in and working, the practical, on-the-ground questions always start popping up. We hear these from musicians and sound techs all the time as they get used to the world of in-ears.
Getting these details right will completely change your experience on stage, so let's dig into the most common ones.
How Loud Should My In-Ear Monitors Be?
This is the big one, and the answer is simple: your IEMs should be at the lowest possible volume where you can still hear everything you need to perform. That's it. The whole point of in-ears is to protect your hearing, so cranking them defeats the purpose.
Unlike stage wedges that you have to blast just to hear over the drums, IEMs give you incredible sound isolation. You’re not fighting the room anymore; you're in your own controlled audio world.
A great rule of thumb is to start soundcheck with your bodypack volume turned almost all the way down. Nudge it up slowly, just until you feel comfortable and can pick out your part in the mix. If your ears are ringing after the service, they were way too loud.
Think of it this way: a vocalist on a Shure PSM300 system should find a level where their own voice is clear and present, but they can still faintly hear the actual sound of the drummer’s cymbals bleeding through from the stage. That’s a good sign you’re at a safe, balanced volume that won't cause hearing damage.
Can I Just Use My Phone Earbuds for Monitoring?
You can technically plug any 3.5mm headphones into a bodypack, but using consumer earbuds (like the ones that came with your phone) for live monitoring is a terrible idea. I see people try it, and it never ends well for two big reasons.
First, they have absolutely zero sound isolation. This means you’ll be forced to turn them up to dangerously loud levels just to hear your mix over the stage volume. Second, they simply aren't built for the job. They lack the durability and, more importantly, the accurate sound you need to make good musical decisions.
- Isolation: Real IEMs, even affordable ones, create a seal in your ear that provides 25dB or more of noise reduction. Regular earbuds just sit there, letting all the stage noise pour in.
- Frequency Response: Professional IEMs are tuned to be relatively flat and accurate, so what you hear is what's really happening. Consumer buds are usually scooped, with hyped bass and treble, which will completely mislead you on stage.
Investing in a proper pair of IEMs, like something from the Westone Audio Mach series, is a direct investment in your hearing and your performance. Don't skip this.
Why Does My Mix Sound So Dry and Sterile?
This is easily the most common complaint from musicians making the switch to IEMs. When your earpieces seal you off from the stage, you suddenly lose all the natural room ambience you’re used to—the sound of the amps in the room, the drums reflecting off the walls, the energy from the crowd.
What you're left with is a direct, close-mic'd sound that can feel like it's trapped inside your head. It's clean, but it can feel lifeless and uninspiring.
The fix is to add that sense of space back into your monitor mix.
The absolute best way to do this is to set up one or two ambient microphones on stage. These aren't for any specific instrument; their only job is to capture the sound of the room and the audience. Your sound engineer can then blend just a little bit of that ambient feed into your in-ear mix, and it will instantly feel more three-dimensional and alive.
If you can't set up dedicated ambient mics, you can still get a similar effect by using the reverb on your digital mixer. On a board like an Allen & Heath SQ or Midas M32, adding a nice "short room" or "plate" reverb to your vocals and other key instruments can take the edge off and make your mix feel much more natural.
What’s the Big Deal About Mono vs. Stereo Mixes?
The choice between a mono and a stereo IEM mix has a massive impact on the clarity and feel of what you hear.
A mono mix is simple: it sends the exact same signal to both of your ears. It only requires one free auxiliary send from the mixing console, which is why it's a common starting point. The downside is that every instrument and vocal is stacked right in the center of your head, which can feel cluttered and hard to decipher.
A stereo mix, however, sends different signals to your left and right ears, creating a wide, panoramic soundscape. This takes up two aux sends from the mixer, which are then panned hard left and right at the console. This lets you or your engineer spread the instruments out across the stereo field.
Imagine you're a keyboard player. You could have your piano panned just a bit to the left, the acoustic guitar to the right, and the lead vocal locked right in the center. This separation makes it dramatically easier to pick out individual parts, feels way more natural, and reduces listening fatigue over a long set or service. If your mixer and wireless system can handle it, running a stereo mix is almost always the way to go.
Ready to build a reliable, great-sounding in-ear monitor system? John Soto Music has everything you need, from road-ready wireless systems to powerful digital mixers. Our experts can help you select the perfect gear for your church, school, or band.
Explore our curated selection of IEMs and live sound equipment at johnsotomusic.com