Picking the right PA system for a small venue—whether it's for your church, coffee shop, or school hall—can feel like navigating a maze of tech specs and sales pitches. The goal is simple: you want clear, professional sound that fills your space without breaking the budget. But getting there without a dedicated audio expert on staff can seem impossible.
This guide is here to cut through the noise. We'll break down the process, starting with the three core pieces of gear you'll need: speakers, a mixer, and microphones, and provide practical examples to help you make the right choice and get a great return on your investment.
Choosing Your Perfect Small Venue PA System
Finding the best PA system for a small venue is all about striking the right balance between power, clarity, and ease of use. You need a setup that sounds great for everything from spoken word to a full band, but is simple enough for volunteers or staff to run with confidence. This isn't just about buying boxes and cables; it's an investment in your venue's atmosphere and your audience's experience.
It’s no surprise that more and more venues are prioritizing great sound. The demand for quality public address systems is growing fast—the market hit USD 3.2 billion in 2023 and is on track to reach USD 5.1 billion by 2032. This trend shows just how vital good audio has become for creating memorable experiences. You can explore more data on the global public address system market to see how venues everywhere are leveling up their sound.
The Three Core Components
Think of your PA system as a chain. For it to work, every single link has to be strong. For a basic setup, you have three essential links:
- Speakers: The voice of your system. They’re what turn an electrical signal into the sound your audience actually hears.
- Mixer: The brain of the operation. This is where you blend all your sound sources—microphones, instruments, laptops—into one cohesive mix.
- Microphones & Cables: The hands and nerves. They capture the sound at its source and carry the signal between all the other components.
Practical Example: A coffee shop hosting an open mic night needs a system that can handle a singer and their acoustic guitar. A solid, simple setup would be two powered speakers on stands, a small 4-channel mixer to blend the vocal mic and guitar, and the right mics and cables to connect it all. This ensures both the voice and instrument are heard clearly throughout the room, creating an inviting atmosphere that keeps customers coming back.
A common mistake I see is people getting fixated only on speaker wattage. A well-matched system with a user-friendly mixer and the right microphones will always sound better than a mismatched, overpowered one. The goal is clarity, not just raw volume.
To help you get started, we've put together a quick sizing guide. Use this table to get a baseline recommendation for speaker power and mixer size based on your venue type and typical audience.
Quick PA System Sizing Guide for Small Venues
| Venue Type / Use Case | Audience Size | Recommended Speaker Power (Total) | Recommended Mixer Channels |
|---|---|---|---|
| Coffee Shop / Small Bar (Spoken Word/Acoustic) | Up to 50 | 500 – 1,000 Watts | 4 – 8 Channels |
| Small Church / House of Worship | 50 – 100 | 1,000 – 2,000 Watts | 8 – 16 Channels |
| School Hall / Community Center | 100 – 150 | 2,000 – 3,000 Watts | 12 – 16 Channels |
| Small Band in a Bar/Club | 100 – 200 | 3,000 – 5,000+ Watts | 16 – 32 Channels |
This table provides a great starting point, ensuring you invest in a pa system for a small venue that truly meets your needs without wasting money on power or features you'll never use.
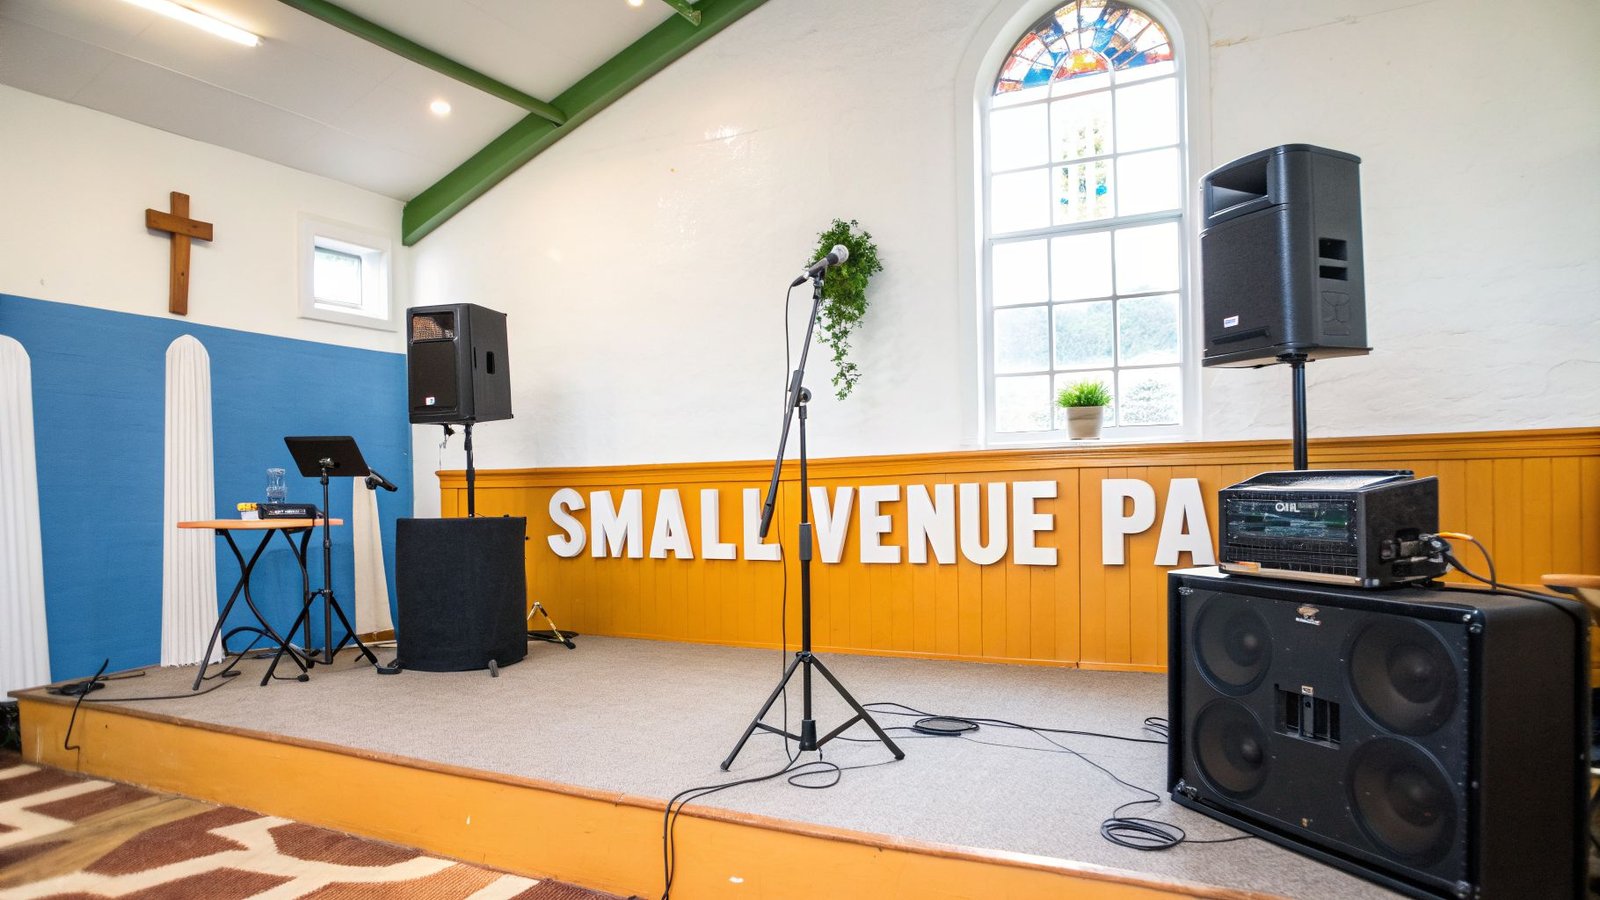
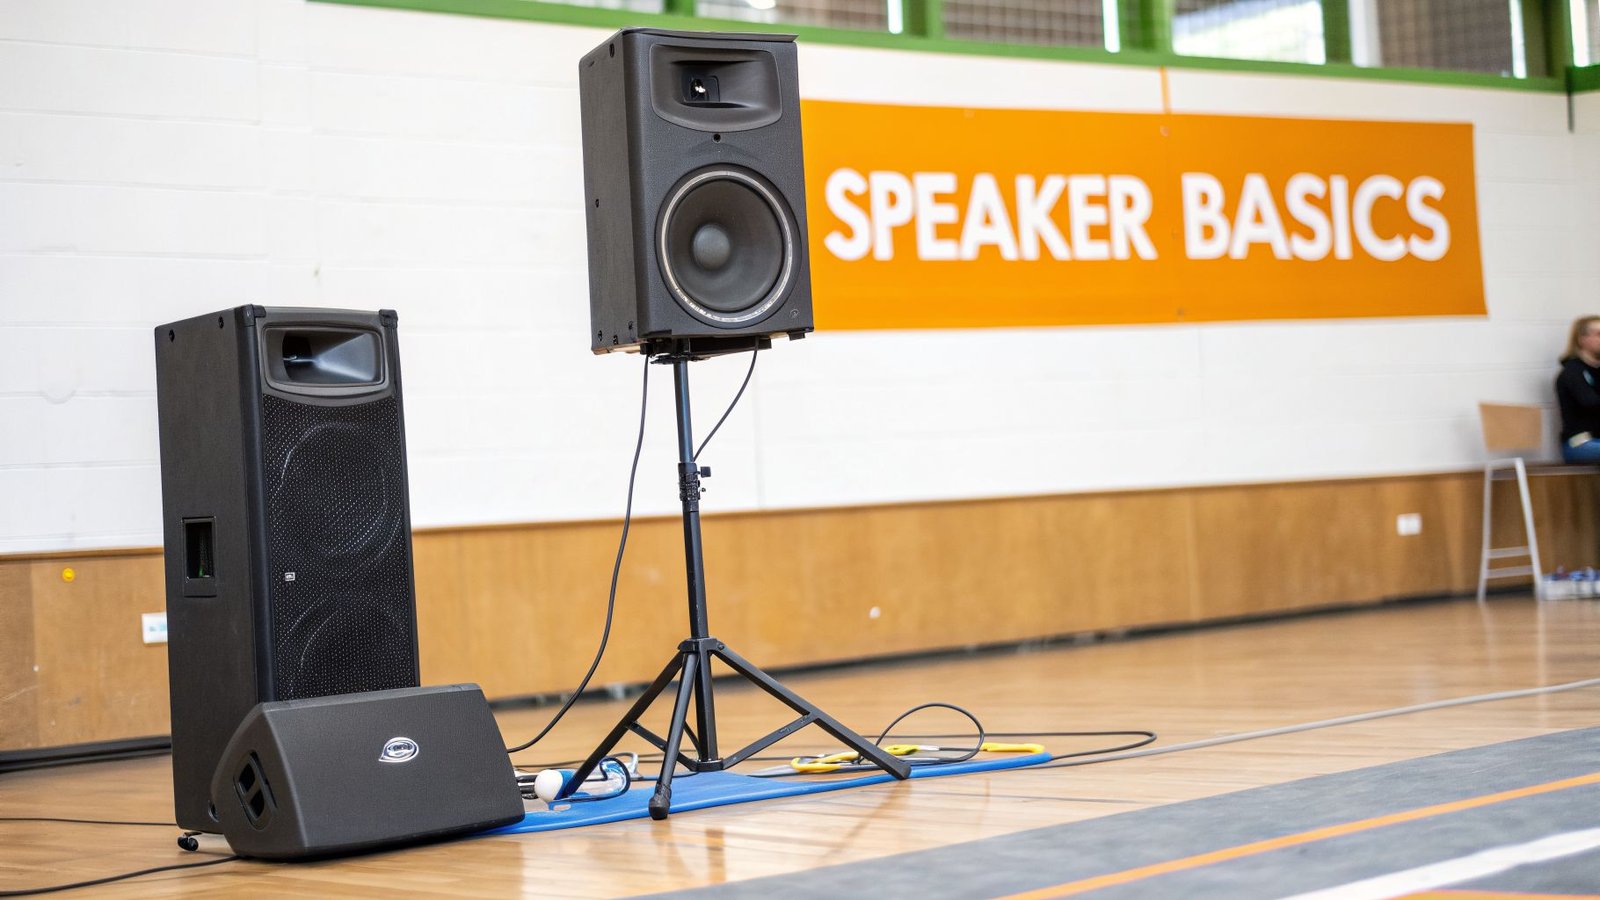
Speakers: The Foundation of Your Sound
Your speakers are the voice of your entire PA system. You can have the best mixer and microphones in the world, but if your speakers can't deliver the sound with clarity and power, it's all for nothing. This is arguably the most important decision you'll make when building a pa system for a small venue.
The first major choice you’ll run into is whether to go with powered (active) or passive speakers. This decision completely shapes your setup's complexity, your budget, and how all the pieces fit together.
Powered vs. Passive Speakers: The Core Decision
A powered speaker, also called an active speaker, has its amplifier built right into the cabinet. The easiest way to think about it is like a combo guitar amp—everything you need to make sound is already in one box. This makes for a dead-simple setup: just run a signal cable from your mixer and a power cord to the wall.
On the other hand, passive speakers are just the speaker and cabinet. They need a separate, external power amplifier to work, much like a guitarist's head-and-cabinet rig. The mixer sends its signal to the power amp, which then boosts it and sends it out to the speakers through special speaker cables.
For most small venues, powered speakers are the way to go. Their plug-and-play design means you'll have faster setups and fewer things to carry and troubleshoot. This is a massive win for volunteers, bands on the move, and school staff.
Practical Example: A small church could grab a pair of powered RCF speakers from our shop for their multi-purpose room. A volunteer can have them up and running in minutes for a youth event, just by plugging them into the wall and a small mixer. The best part is the manufacturer perfectly matches the built-in amp to the speaker, so there's no guesswork and you get the best possible sound—a professional result without needing a professional on staff.
How Speaker Size Shapes Your Sound
The size of a speaker's main driver (the woofer) has a huge effect on how well it can produce bass and low-end frequencies. The right size comes down to what you’ll be amplifying.
- 10-Inch Woofer: These are fantastic for vocal clarity and speech. They're perfect for spoken word events, coffee shop acoustic acts, or as tight, compact stage monitors where you don't have a lot of floor space.
- 12-Inch Woofer: This is the do-it-all, versatile workhorse. A 12-inch speaker gives you a great balance of everything—enough low-end punch for a small band with a bass and kick drum, while still keeping vocals crisp and clear. This is the sweet spot for many small venues.
- 15-Inch Woofer: When you need more thump, this is your answer. If your venue has full bands, DJs, or you play a lot of bass-heavy tracks, a 15-inch speaker delivers that deep low end you can feel from the kick drum and bass guitar.
Practical Example: A gigging band that plays bars and small clubs would get a lot of mileage out of a pair of 12-inch or 15-inch powered mains, like the rugged options from dBTechnologies. This gives them the power they need to cut through crowd noise and have an impactful show, night after night, leading to more bookings and a bigger following.
Smart Speaker Placement for Clear Audio
Where you put your speakers is just as critical as which ones you buy. Bad placement will create feedback, a muddy sound, and spots in the room where nobody can hear anything.
- Elevate Your Main Speakers: Always, always put your main "Front of House" (FOH) speakers on stands. This gets the sound up over the heads of the people in the front row so it can travel to the back of the room. Putting speakers on the floor just blasts people’s legs and is a recipe for feedback from your stage mics.
- Use Monitors for Performers: Your performers have to hear themselves to play well. Wedge-shaped floor monitors are designed to sit on the stage floor and angle up, sending a custom mix to each musician so they can stay in time and on pitch. An acoustic guitarist, for example, needs to hear their own guitar and vocals clearly over the rest of the band.
- Avoid Corners: Pushing speakers right into corners or up against walls will artificially boost the bass, making your mix sound "boomy" and undefined. Try to pull them a few feet away from walls for a much more natural and balanced sound.
At John Soto Music, we make it easy to get a complete system where every component is perfectly matched. Our turnkey PA packages from RCF and dBTechnologies come with powered speakers, stands, and all the cables you need—everything for fantastic sound right out of the box. Browse our curated PA systems and take the guesswork out of building your perfect small venue rig today.
Mixers: Your Audio Command Center
The mixer is the brain of your entire sound system. It’s where every single sound source—microphones, instruments, laptops, you name it—gets plugged in. From there, you can blend, balance, and send everything out to your speakers. Getting this choice right is absolutely critical for a great-sounding pa system for small venue.
Think of the mixer as your audio command center. Every fader you push and knob you turn gives you direct control over what the audience hears. A good mixer makes getting a clear, professional sound easy, but the wrong one will be a constant source of frustration and poor audio quality.
Your very first step is figuring out how many channels you actually need. A channel is just one input for one sound source. The best way to do this is to sit down and list every single thing you could possibly ever need to plug in. Don't be shy here; it's always better to have a few extra channels than to run out when you need them most.
Calculating Your Channel Count
Let’s walk through a real-world example for a small church worship band. This is a common scenario that requires a mixer capable of handling several inputs at once.
Here’s a typical input list:
- Vocal Mics: 4 (Lead Singer, 2 Backing Vocalists, Pastor/Speaker)
- Acoustic Guitar: 1
- Stereo Keyboard: 2 (keyboards need two channels for left and right signals)
- Bass Guitar: 1 (plugged in directly)
- Laptop for Tracks: 2 (this also needs a stereo input)
- Guest Input: 1 (for a visiting speaker or musician)
Add that all up, and your total comes to 11 channels. This means a 12 or 16-channel mixer is the perfect fit, giving you what you need right now plus a little room to grow. This kind of planning stops you from buying an 8-channel mixer, only to realize it's too small the minute a guest musician shows up.
Analog vs. Digital Mixers: A Simple Analogy
Your next big decision is whether to go with an analog or a digital mixer. This choice dramatically affects your workflow, features, and how easy the system is to use, especially for volunteers.
Think of an analog mixer like a classic car from the '70s. Every single function has its own physical knob or button right there on the surface. What you see is what you get—it’s immediate, tactile, and straightforward. The downside? It’s missing modern conveniences. If you want to add effects like reverb or delay, you have to buy and hook up separate, external gear.
A digital mixer is like a modern car with a big central touchscreen. While you still have physical faders, that screen opens up a whole world of powerful, built-in features. This includes pro-level effects, equalization, and compression on every single channel, with no extra equipment to buy or manage.
For most small venues run by volunteers or non-technical staff, a digital mixer is a complete game-changer. Features like scene recall, which lets you save all your settings and load them instantly, take all the guesswork out of getting consistent sound.
Practical Example: A school could save different mixer "scenes" for its events: one for the morning assembly, another for the school band, and a third for a theater production. A teacher can walk up, tap the "Assembly" scene, and all the mic levels and settings are instantly perfect, every single time. This saves countless hours of setup and ensures every event sounds professional.
Digital mixers like the Allen & Heath CQ series are built for exactly this purpose. They pack powerful tools like automatic feedback suppression and built-in effects into a simple, easy-to-use interface. This empowers everyday users to get a polished, professional result without needing an audio engineering degree. As the public address system market is projected to hit USD 3.7 billion globally in 2026, the demand for user-friendly and powerful solutions is only growing. And while online sales are increasing, expert advice from retailers still drives nearly 60% of sales for complex systems. You can read the full research on the PA system market to see how the industry is evolving.
At John Soto Music, we offer exclusive deals on user-friendly digital mixers that give your small venue the professional sound it deserves. Check out our selection of Allen & Heath mixers and start building a better sound system today.
Your PA system is only as good as the sound you put into it. It’s a classic case of "garbage in, garbage out." Great sound always starts at the source, which means picking the right microphones is one of the most important decisions you'll make.
A microphone isn’t just a microphone; it’s a specialized tool designed for a specific job. Choosing the wrong one can make even a world-class speaker system sound muffled, thin, or just plain wrong. This is a vital part of planning your pa system for a small venue. The two main types you’ll run into are dynamic and condenser microphones, and they couldn’t be more different.
Dynamic vs. Condenser: The Right Mic for the Job
Think of a dynamic microphone as the rugged, all-purpose workhorse of the audio world. It’s built like a tank, designed to handle loud sounds up close, and it’s fantastic at rejecting noise from the sides and back. This makes it the go-to choice for live vocals, especially on a noisy stage.
Practical Example: The legendary Shure SM58 is the perfect example. Hand one to a singer in a loud club, and it will capture their voice with power and clarity while minimizing the sound of the drums and amps bleeding into their channel. It’s an industry icon for a reason, and a must-have for any venue with live music.
A condenser microphone, on the other hand, is like a high-definition camera for sound. It's far more sensitive and captures the subtle details, air, and nuances that dynamic mics often miss. This makes them the perfect tool for controlled environments or for capturing delicate, complex sound sources.
Practical Example: If a church wants to amplify its choir, a pair of condenser mics on stands will capture the rich, blended sound of all the voices beautifully. If you want to mic an acoustic guitar, a condenser will pick up the intricate shimmer of the strings and the warm resonance of the wood in a way a dynamic mic just can't match, creating a truly professional and detailed sound for the audience.
Cutting the Cord with Wireless Systems
Let’s be honest, cables can be a mess. They create trip hazards, limit a performer's ability to connect with the audience, and clutter up the stage. Wireless systems solve all of this, giving your vocalists and speakers total freedom to roam.
A wireless handheld microphone works just like its wired cousin but sends the audio signal over radio frequencies to a receiver connected to your mixer. This is perfect for a lead singer who owns the stage or a pastor who needs to move around freely while delivering a message.
Investing in a quality wireless system is investing in confidence. Cheap systems are notorious for dropouts and interference, which can bring a performance or service to a screeching halt. Our reliable, interference-free wireless packages ensure your audio stays crystal-clear from start to finish.
In-Ear Monitors: A Game Changer for Bands
While the audience hears the mix coming from the main speakers, your performers on stage need to hear themselves clearly. Instead of using loud, clunky floor monitors that contribute to feedback and muddy the stage sound, modern bands are turning to in-ear monitor (IEM) systems.
An IEM system sends a personalized monitor mix directly to a performer’s earbuds. This means the drummer can get a mix packed with kick drum and bass, while the singer gets a vocal-heavy mix to stay on pitch—all without affecting what anyone else on stage hears.
Benefits of Using an IEM System:
- Reduced Stage Volume: With no loud wedges blasting away, the overall stage volume drops dramatically. This leads to a much cleaner front-of-house mix for the audience.
- Improved Performances: When musicians can hear themselves perfectly, they sing and play with more accuracy and confidence. It's a night-and-day difference.
- Hearing Protection: IEMs also act as high-quality earplugs, protecting your performers’ hearing from damagingly loud stage volumes.
Practical Example: A band playing in a small bar will notice the improvement immediately. The mix will sound tighter and more professional, and vocals will cut through clearly because the sound engineer isn’t fighting a wall of noise coming from the stage. This leads to better shows, happier audiences, and a reputation for great live sound.
Ready to find the perfect microphone or go wireless? Discover our selection of professional microphones and IEM systems and capture every performance with the clarity it deserves.
Cabling and Power: The Unsung Heroes of Your Setup
While speakers and mixers get all the attention, your PA system is completely useless without quality cables and clean power. Think of them as the circulatory system for your entire audio setup. Skimping here is a classic, costly mistake that leads to frustrating noise, signal loss, and even permanent damage to your expensive gear.
Believe me, investing in reliable connections is one of the smartest decisions you can make for your PA system for a small venue. It's the difference between clean, professional sound and a system plagued by hum, buzz, and dropouts. This is especially true as more venues recognize the need for solid infrastructure. The North American public address system market was valued at USD 604.92 million in 2022 and is projected to hit USD 943.24 million by 2030. You can discover more insights on the public address system market to see just how much the industry is prioritizing reliability.
The Right Cable for the Right Job
Not all cables are created equal, and using the wrong type will degrade your sound or simply not work at all. Let's break down the essentials:
- XLR Cables: These are the gold standard for microphones and for connecting your mixer to your main speakers. Their three-pin, balanced design is fantastic at rejecting noise over long distances, ensuring your audio signal arrives clean and clear.
- ¼-Inch TS/TRS Cables: You'll use these for instruments. A TS (Tip-Sleeve) cable is for unbalanced signals, like from an electric guitar. A TRS (Tip-Ring-Sleeve) cable can carry a balanced signal (like from a keyboard to a DI box) or a stereo signal (for headphones).
- Speakon Cables: If you choose passive speakers, these are non-negotiable. They are designed specifically to handle the high-power signal from an amplifier and feature a secure locking mechanism to prevent them from ever getting unplugged by accident.
Streamline Your Setup with a Stagebox
For any portable church, school, or gigging band, a stagebox (or digital snake) is a game-changer. Instead of running a dozen individual microphone cables from the stage back to your mixer, you plug everything into the stagebox. Then, a single, lightweight multi-channel cable connects the box to your mixer.
A stagebox will cut your setup and teardown time in half. It keeps your stage incredibly neat, eliminates the "spaghetti" of cables, and drastically reduces the chances of someone tripping over a cord and unplugging a critical microphone mid-service.
Practical Example: A worship team can leave all their mic and instrument cables pre-plugged into a stagebox. When they arrive, they just place the box on stage and run one cable to the mixer at the back of the room. This transforms a 30-minute cabling job into a 5-minute task, freeing up valuable time for soundcheck and rehearsal.
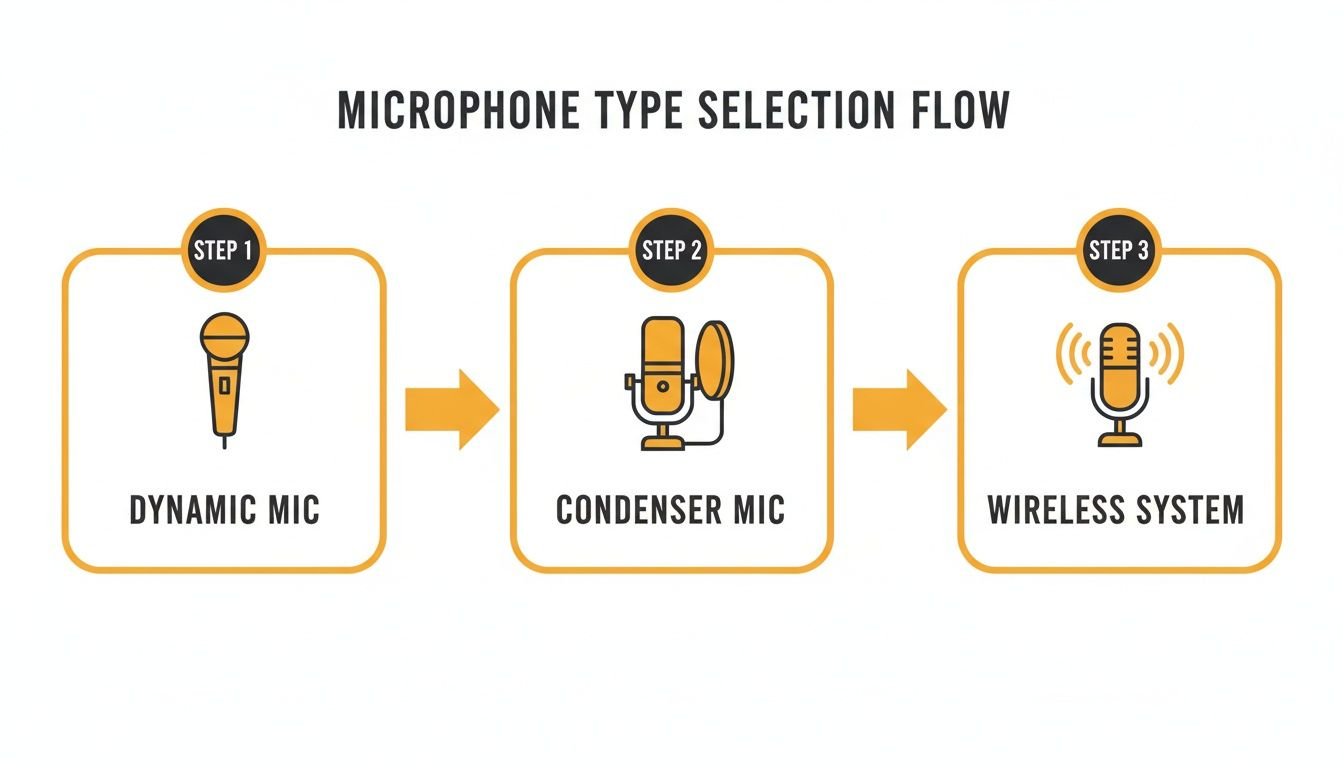
This flowchart shows how different microphone types, each requiring a specific cable, fit into a live sound workflow.
The flow from rugged dynamic mics to sensitive condensers and versatile wireless systems really highlights why you need a robust and organized cabling strategy to support them all.
To help you keep track of all these connections, here is a quick checklist of the essential cables and accessories you’ll need.
Essential Cable and Accessory Checklist
| Item | Purpose | Common Type | Pro Tip |
|---|---|---|---|
| XLR Cables | Connect mics to mixer/stagebox; mixer to powered speakers | Male-to-Female | Buy various lengths (10ft, 25ft, 50ft) to keep runs tidy. |
| Instrument Cables | Connect guitars, basses, and keyboards to DI boxes or amps | ¼-Inch TS | Never use these in place of a speaker cable; it's a fire hazard. |
| TRS Cables | Balanced connections for keyboards; headphone outputs | ¼-Inch TRS | Label your TRS cables to avoid mixing them up with TS cables. |
| Speakon Cables | Connect power amps to passive speakers | Speakon to Speakon | Always use the proper gauge wire for your speaker's power rating. |
| Power Conditioner | Protect gear from surges and filter electrical noise | Rack-mounted unit | Get one with enough outlets for all your gear at the sound booth. |
| DI Boxes | Convert unbalanced instrument signals to balanced mic-level | Passive or Active | Active DIs need phantom power; passive DIs are simpler. |
| Gaffer Tape | Secure cables to the stage and floor to prevent tripping | 2-inch black | Unlike duct tape, it won't leave a sticky residue on your cables or floors. |
Having these items on hand before installation day will save you a lot of headaches and last-minute trips to the store.
Why You Need a Power Conditioner, Not Just a Power Strip
A power conditioner is essential insurance for your valuable audio gear. It does far more than a simple power strip from the hardware store; it filters out "dirty power" (electrical noise and interference from lights or appliances) and, most importantly, protects your equipment from power surges and voltage spikes that can instantly fry sensitive electronics.
A single power surge can destroy a digital mixer. Trust me, a power conditioner is a small price to pay to protect a multi-thousand-dollar investment. Find the right cables and power solutions at John Soto Music to build a truly reliable system.
How to Tune Your System for Great Sound
Owning a great pa system for a small venue is a fantastic start, but it's only half the battle. The real magic happens when you tune it to the room, transforming a pile of gear into a single, cohesive instrument that sounds amazing. This isn't some dark art reserved for pro audio engineers—with a few key techniques, anyone can dial in a clear, powerful mix.
The entire foundation of a clean, dynamic mix is built on proper gain structure. Think of the gain knob as the faucet for each channel on your mixer. Your goal is to get a strong, healthy flow of signal into the mixer without overflowing—which causes nasty distortion, or "clipping."
Setting Proper Gain Structure
A clipped signal is your absolute enemy. It sounds harsh, brittle, and can physically damage your speakers over time. Here’s a simple, foolproof way to set the gain for any microphone or instrument.
- Have the singer or musician perform at the loudest volume they will reach during the show. This is critical.
- As they play, watch the level meter for their channel on the mixer. Slowly turn up the gain knob until the signal is consistently hitting the yellow lights. You want it living in that zone.
- If you see that red "peak" or "clip" light flash even once, you've gone too far. Just dial the gain back a touch until it stays out of the red.
Once your gain is properly set, you can forget about it. From then on, you'll use the channel's main fader to control how loud that instrument is in the overall mix. This single skill is the secret to getting a clear sound and avoiding the distortion that plagues so many small venue systems.
Eliminating Feedback Before It Starts
Nothing kills the vibe faster than that piercing shriek of feedback. The best way to deal with it is to proactively hunt it down and destroy it before the show even starts. We call this "ringing out the monitors."
Ringing out your monitors is like teaching your PA system which frequencies are troublemakers. By identifying and cutting the specific frequencies that want to feed back, you create more headroom, which lets you turn the monitors up louder without any unwanted squealing.
Practical Example: To ring out a vocalist's monitor, have them stand at their microphone while you slowly bring up the volume for their floor wedge. The moment you hear a note start to whine or ring, use your mixer's graphic EQ to find that exact frequency and pull its slider down. Repeat this process a few times until the monitor can reach a useful volume without howling. This gives performers the confidence to deliver their best, knowing they can hear themselves clearly.
Modern digital mixers from brands like Allen & Heath make this incredibly easy with built-in tools that automatically find and suppress feedback for you.
Taming the Room with Smart Placement
Finally, remember that the room itself is an instrument. A space with lots of hard, flat surfaces—think gymnasiums, fellowship halls with tile floors, or rooms with large windows—will create a mess of echoes that turn your mix into mud.
- Avoid the Corners: As we've mentioned, sticking your main speakers right into the corners of a room will make the bass sound boomy, undefined, and overwhelming. Pull them a few feet away from the walls for a much tighter and more natural low end.
- Tame Reflections: If your venue is very "live" and echoey, you'd be amazed at what a few simple acoustic panels or even just some heavy curtains can do. These materials absorb sound waves instead of letting them bounce around the room, which instantly cleans up the mix.
Investing in a user-friendly system makes this entire process so much simpler. A quality digital mixer with a built-in EQ and feedback suppression, paired with well-designed speakers, empowers anyone to get a fantastic result. Take a look at our complete PA system packages to find a turnkey solution that makes tuning your room a breeze.
Your Small Venue PA Questions Answered
We get it. Even with a good guide, a few nagging questions always pop up right before you’re ready to pull the trigger on a new system. To help you move forward with confidence, here are some straight answers to the most common questions we hear from churches, bands, and schools about buying a PA system for a small venue.
Do I Need a Subwoofer for My Small Venue?
The honest answer is: it depends entirely on the kind of sound you’re pushing. For events that are mostly spoken word, like a sermon, a school assembly, or a corporate presentation, you can get fantastic clarity without a sub. The same goes for a solo singer-songwriter with an acoustic guitar. Your main speakers are built to handle those frequencies just fine on their own.
But the second you introduce any real low-end energy, a subwoofer becomes non-negotiable. Think of it like this: your main speakers deliver the vocals and melody, but the subwoofer provides the physical heartbeat and energy you can feel.
You absolutely need a subwoofer if you have:
- A full band with a kick drum and a bass player.
- A DJ spinning dance, electronic, or hip-hop tracks.
- Any kind of pre-recorded music or backing tracks with deep bass.
Trying to run these acts without a sub will leave your sound feeling hollow and thin. It just won’t have the professional weight and impact your audience expects. The sub is the key to that full, immersive experience that gets people moving and creates a memorable event.
How Many Watts Do I Really Need?
This is one of the most common questions, but wattage can be a tricky number. A much better measure of a speaker's actual loudness is its SPL (Sound Pressure Level). That said, wattage gives us a decent ballpark to start with.
For a small coffee shop gig with maybe 50-100 people, a system in the 500-1000 watt range will work great for acoustic acts and speech. If you're in a bigger space like a small church or a community hall with 100-200 people, you’ll want to look for something in the 1000-2000+ watt range to make sure you have clean volume without pushing the gear too hard.
Remember, it is always better to have more power than you need. A system running comfortably at 50% sounds clean and full. A system being pushed to 100% just to be heard will sound thin, distorted, and harsh. Having that extra headroom is a key part of professional sound.
You can find a more detailed chart for sizing in the first section of this guide.
Can I Run My Whole System Off One Power Outlet?
Please don't. This is a risky move that we see people try, and it almost never ends well. A full PA system—especially with powered speakers, a digital mixer, and any kind of lighting—draws a lot of power. Plugging it all into a single circuit is just asking for a tripped breaker in the middle of your event.
To keep things stable and safe, you absolutely have to split the power load across at least two separate electrical circuits. A standard professional practice is to put the entire sound system on one dedicated circuit and all the stage lighting on a completely different one. This stops the lights from introducing noise into your audio or causing a total blackout.
Most importantly, always plug your sensitive gear—especially your digital mixer and wireless systems—into a dedicated power conditioner. It's cheap insurance that protects your expensive equipment from power surges and cleans up "dirty" power for a quieter signal.
At John Soto Music, our team is ready to help you sort through these questions and build a reliable sound system that’s perfect for your needs. We've put together turnkey packages with user-friendly digital mixers and speakers that we know and trust, taking the guesswork out of it for you.
Shop our complete PA systems today and get the clear, professional sound your venue deserves.