
Getting a professional drum sound all starts with picking the right microphone. For decades, a Sennheiser drum mic has been the secret weapon for capturing the true power and detail of a drum kit, giving you clarity and punch in any room. Their reputation wasn't built overnight—it comes from rock-solid reliability, tough design, and consistent performance, night after night. Ready to transform your drum sound? Let's dive in.
Why Trust Sennheiser for Your Drum Sound
When you're trying to capture the raw, explosive energy of a drum kit, you need mics that can take a beating. Drums produce some of the highest sound pressure levels (SPL) you'll ever deal with on stage. Lesser mics will distort and clip, turning a powerful kick drum into a fuzzy, muddy mess.
Sennheiser built its name by engineering microphones specifically to handle these extreme dynamics without even breaking a sweat.
Think of it this way: you wouldn't put regular street tires on a race car. It's the same idea. You need specialized tools for the high-impact world of drum audio. A Sennheiser drum mic is that professional-grade tool, designed from the ground up to perform flawlessly under pressure.

Built for the Stage and Studio
Sennheiser has long been a giant in professional audio. Their drum mics, like the iconic e904 for toms and the e902 for kick drums, are staples for live sound engineers hitting the road with bands, outfitting school auditoriums, and setting up church sound systems.
The global market for kick drum microphones alone was valued at a solid $100 million in 2024, and that number is expected to climb as live music and project studios continue to grow. This demand is all about finding reliable gear, which is why over 70% of pro audio pros lean on brands like Sennheiser for their unmatched durability in venues from sanctuaries to major festival stages. You can discover more insights about the kick drum microphone market's growth.
This trust really comes down to a few key things Sennheiser just gets right:
- Durability and Construction: Sennheiser mics are built like tanks, with metal housings that can easily shrug off an accidental stick hit and handle the grind of constant setup and teardown.
- Sonic Consistency: Each microphone is voiced for a specific job. When you grab an e902, you know exactly what you're going to get—a great kick sound, every single time.
- High SPL Handling: They capture the absolute loudest sources without distorting. This preserves the natural attack and punch of the drum, giving you a clean, powerful signal to work with.
A Practical Example of Sennheiser's Reliability
Let's imagine you're the volunteer sound tech at your church. The drummer is playing with real heart, but the kick drum just sounds weak and undefined out front. It's getting lost. You swap out the cheap, no-name mic for a Sennheiser e902.
Instantly, the entire feel changes. The low-end punch is tight and powerful, the click from the beater is perfectly clear, and the kick drum finds its place in the mix without you having to touch the EQ.
That's the Sennheiser difference. It’s not just about capturing sound; it’s about capturing the right sound with zero fuss. This lets you focus on creating a great mix instead of spending your time fighting with your gear. This is why they are a top choice for anyone who is serious about their audio.
Choosing the Right Sennheiser Drum Mic for Each Drum
Picking the right Sennheiser mic for each drum is a lot like a photographer choosing a specific lens. Sure, any lens can take a picture, but the right one captures the subject with the perfect character, depth, and focus. This guide will break down the most popular Sennheiser drum mics to help you get that powerful, professional drum sound you're after.
Before we dive in, let’s talk about a mic's polar pattern. Think of it as the microphone's "field of vision." Most of these drum mics use a cardioid pattern, which is like a flashlight beam—it picks up what’s directly in front of it and rejects sound from the sides and back. This is absolutely critical for isolating a tom from a splashing crash cymbal right next to it.
Kick Drum Foundation with the e602 and e902
The kick drum is the heartbeat of your band. It needs a mic that can handle its massive low-end punch and deep resonance without turning to mud. Sennheiser has two incredible options purpose-built for this job: the e602-II and the e902.
Sennheiser e602-II: This is the absolute workhorse kick mic for countless gigging bands, schools, and churches. It comes pre-EQ'd from the factory to give you that thunderous low-end and the defined "click" of the beater. You get a mix-ready sound right out of the box. Its large diaphragm handles insane volume levels without distorting.
Sennheiser e902: As part of Sennheiser's elite e900 series, the e902 offers a faster, more refined sound. It captures the attack of the kick beater with incredible precision, delivering a tight, focused low-end. It's perfect for studio recording or larger live shows where every sonic detail is under a microscope.
Practical Example: A classic pro technique for either mic is to place it just inside the port of the resonant head, aiming it right at the beater. This spot gives you the perfect blend of the drum's low-end "boom" and the sharp "thwack" of the attack.
Capturing Toms and Snare with the e604 and MD 421
Your toms and snare need mics that can capture their punch and body without becoming a forest of mic stands for the drummer to navigate. Sennheiser offers two legendary choices for this.
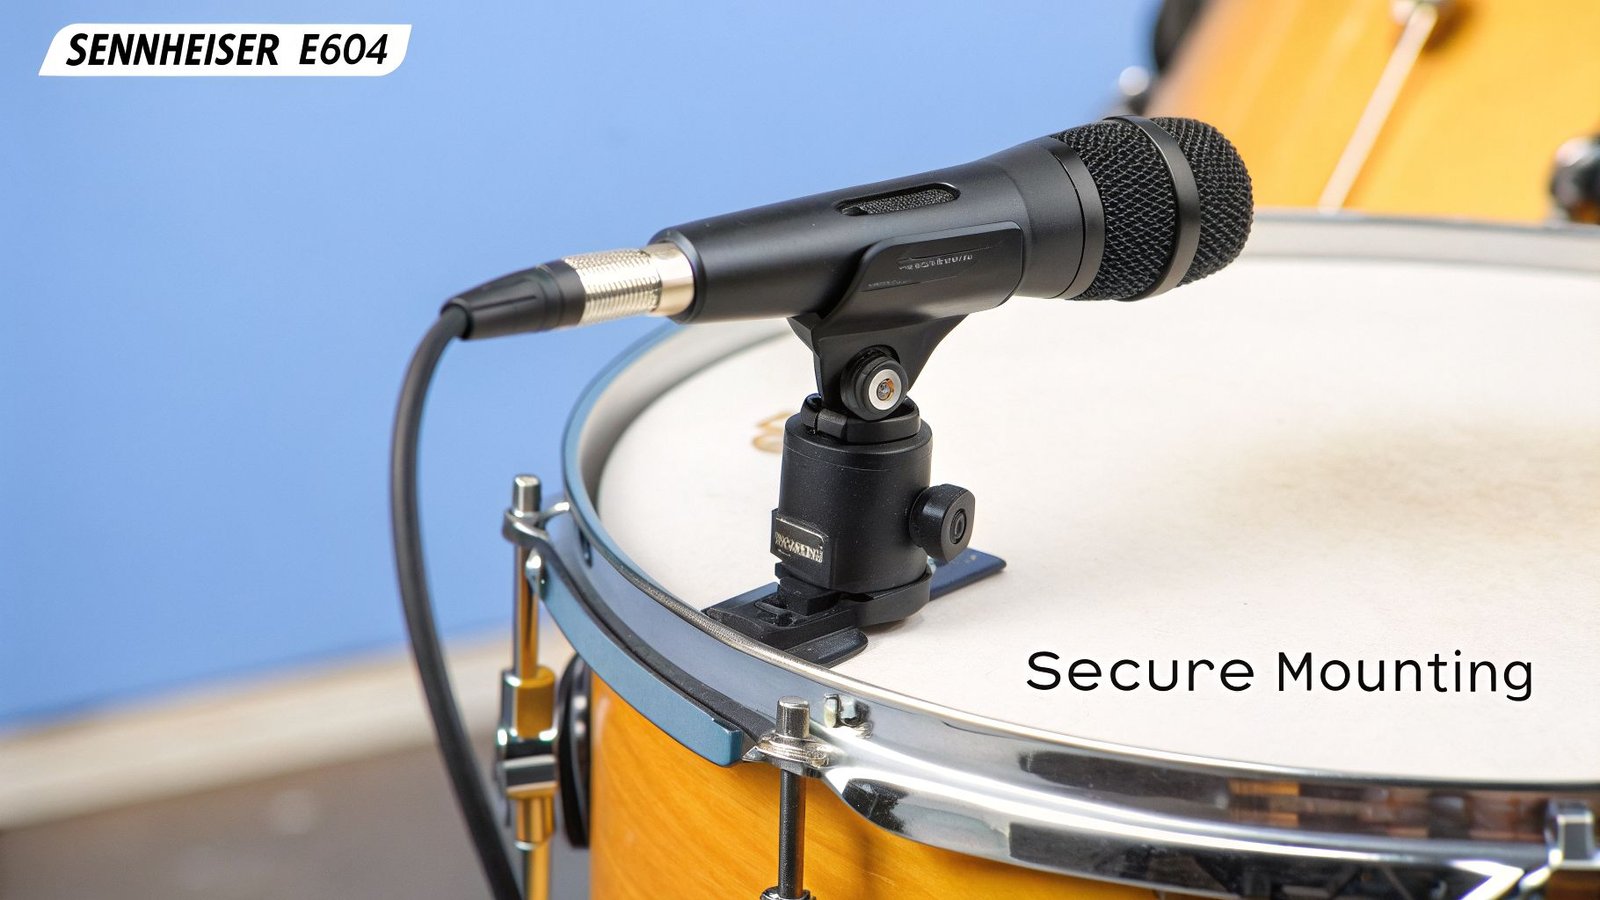
The Sennheiser e604 is a small, tough dynamic mic that's famous for one brilliant feature: the integrated rim clip. This little clip lets you mount it directly to the rim of a tom or snare, completely eliminating the need for a separate mic stand. It saves a ton of space and setup time, making it a live sound favorite everywhere.
And then there's the icon: the Sennheiser MD 421 II. For decades, engineers have called this their "desert island" microphone. It’s beloved for its rich, full-bodied tone on toms. Its larger size houses a unique five-position bass roll-off switch, giving you incredible control to dial in the perfect amount of warmth for any tom in any room.
A quick-reference guide is always helpful when you're trying to decide. Here’s a breakdown of the most popular Sennheiser drum mics and what they do best.
Sennheiser Drum Mic Model Comparison
| Microphone Model | Primary Use | Polar Pattern | Key Sonic Trait |
|---|---|---|---|
| e602-II | Kick Drum | Cardioid | Punchy, pre-EQ'd low-end and attack |
| e902 | Kick Drum | Cardioid | Tight, focused, and fast low-frequency response |
| e604 | Toms & Snare | Cardioid | Clear and punchy with excellent isolation |
| MD 421 II | Toms, Kick, Bass Cabs | Cardioid | Warm, full-bodied tone with a versatile 5-position bass control |
| e614 | Overheads & Hi-Hats | Super-cardioid | Crisp, detailed, and clear high-frequency capture |
| e914 | Overheads & Hi-Hats | Cardioid | Smooth and articulate high-end for nuanced detail |
This chart should give you a solid starting point for building your mic locker, whether you're buying a full set or just adding one or two key pieces to your collection.
When it comes to drum mics, Sennheiser's MD 421 stands as an iconic legend, a workhorse that's shaped live and studio sound for decades. In the broader professional microphones arena, Sennheiser holds strong as a top player in a market expected to grow from $5.89 billion in 2026 at an 8.80% CAGR. Super-cardioid patterns, like those in many Sennheiser drum mics, are ideal for rejecting bleed from other drums in live settings. Furthermore, XLR connectivity, which powers most Sennheiser drum mics, claimed over 79% market share in 2024 for its balanced signal prowess, ensuring fewer dropouts during school gigs or church services. Discover more insights about Sennheiser's market presence on electroiq.com.
Cymbals and Overheads: The e614 and e914
To really capture the shimmer of your cymbals and the intricate detail of a hi-hat, you need a different tool altogether: a condenser microphone. The Sennheiser e614 and e914 are small-diaphragm condensers that are absolutely brilliant for this.
These mics capture high frequencies with beautiful clarity, but without ever sounding brittle or harsh. Used as a pair for overheads, they create a gorgeous stereo image of the entire drum kit, gluing it all together.
Practical Example: For a hi-hat, a single e614 can be positioned to pick up every little "chick" and "sizzle" with amazing detail, while its tight polar pattern helps reject the loud crack of the nearby snare drum. This gives your groove the definition it needs to shine.
Practical Mic Placement for a Perfect Drum Tone
Having a set of great Sennheiser drum mics is half the battle. The other half? Knowing exactly where to put them. This is where your sound goes from good to great.
Think of it this way: moving a microphone even an inch can completely change the character of a drum. It’s the difference between a kick drum that sounds like a cardboard box and one that hits you in the chest. Whether you're setting up for a church service, a school concert, or a weekend gig, these techniques will give you a professional starting point tonight.
Kick Drum Placement for Punch and Body
The kick drum is the heartbeat of your mix. How you mic it sets the foundation for everything else. You're generally chasing two things: the sharp attack of the beater hitting the head, or the deep boom of the shell. Your Sennheiser e602-II or e902 is built for this job.
For Maximum Attack: Place the mic just inside the port hole of the front drum head. You'll want to aim the capsule right at the spot where the beater makes contact. This position gives you that "click" and "thwack" that helps a kick cut through a dense rock or pop mix. It’s essential for modern worship music.
For Maximum Boom: Pull the mic out of the drum and position it just outside the port hole, about 1-3 inches from the head. This captures more of the shell's low-end resonance, delivering a rounder, warmer tone. This approach works wonders for jazz, folk, or any style needing a softer, fuller kick sound.
Practical Example: A very popular middle-ground technique is to place the mic inside the drum but angle it slightly away from the beater, pointing more towards the shell. This gives you a natural blend of both attack and body right out of the gate.
Snare and Tom Miking for Clarity and Impact
For your snare and toms, the goal is twofold: capture their unique voice while rejecting as much sound as possible from the cymbals right next to them. This is where the tight cardioid pattern on mics like the Sennheiser e604 and MD 421 becomes your best friend.
Top Snare Miking: Position your mic about 1-2 inches above the rim, angled down toward the center of the snare head. This is the sweet spot for capturing that sharp "crack" of a rimshot and all the detailed ghost notes in between. A steeper angle gives you more isolation from the hi-hat, while a flatter angle picks up more of the drum's woody shell tone.
Pro Tip for Snare: To get a truly complete, studio-quality snare sound, add a second mic underneath the drum, pointing up at the snare wires. On your mixer, you absolutely must flip the polarity on this bottom mic's channel. Look for the "Ø" symbol. This simple move adds all the "fizz" and "sizzle" from the wires, giving you that polished sound you hear on records.
Tom miking follows the same logic. The built-in clips on the e604 make this part incredibly simple. Just clip the mic to the rim, position it 1-2 inches from the head, and aim it at the center to get a solid, punchy tone.
This diagram breaks down the fundamental concepts, showing where each mic typically lives to capture its part of the kit.
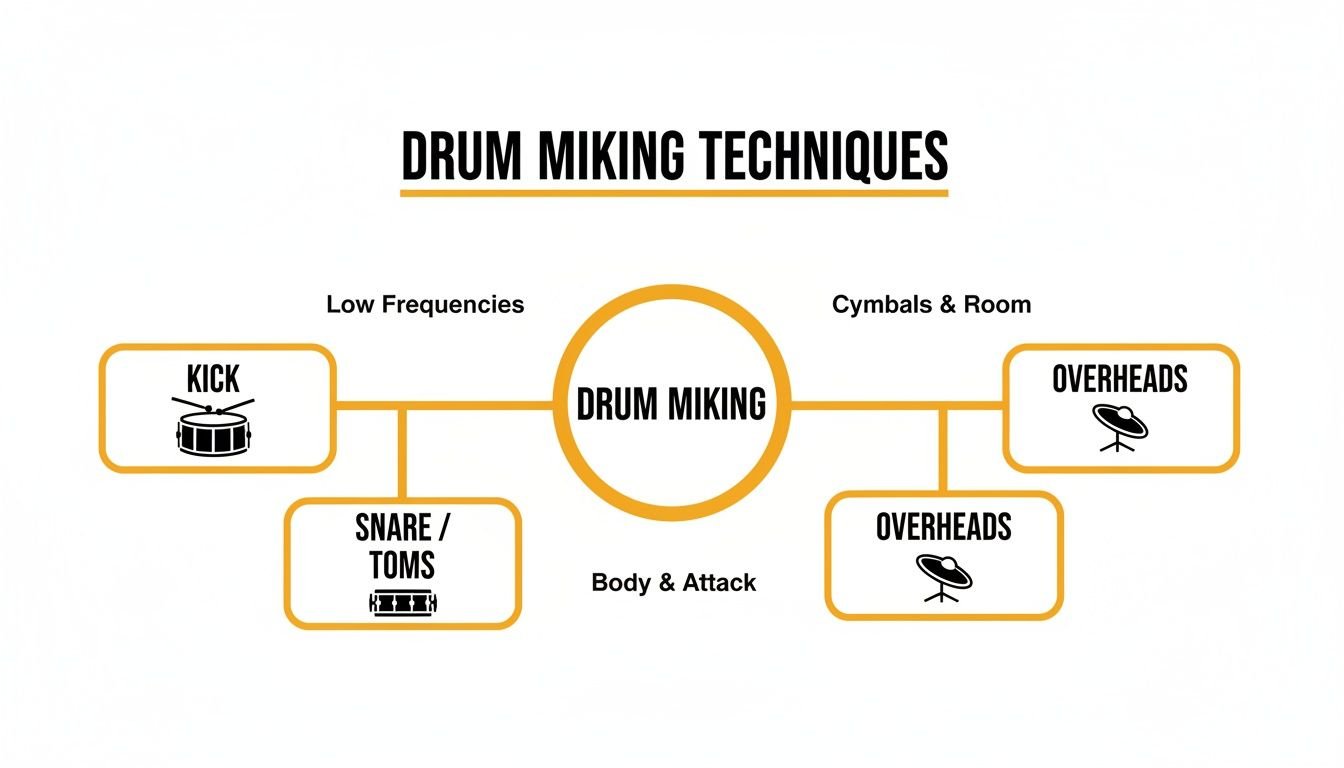
As you can see, a full Sennheiser drum mic setup uses specific mics to isolate the different frequency ranges and characteristics all across the kit.
Overheads for a Cohesive Stereo Image
Finally, your overhead mics are what glue the entire drum kit together, making it sound like one cohesive instrument instead of a collection of individual drums. They capture the shimmer of the cymbals, of course, but their real job is to provide a balanced stereo image of the whole kit. A pair of small-diaphragm condenser mics, like the Sennheiser e614 or e914, is perfect for this.
There are a lot of complicated stereo techniques out there, but a simple spaced pair is a fantastic and reliable place to start.
- Place one mic on a boom stand over the hi-hat side of the kit.
- Place the second mic on another boom stand over the ride cymbal side.
- Here's the critical part: get a tape measure and make sure both mics are the exact same distance from the center of the snare drum. This prevents phase cancellation issues that can make your snare sound thin and weak.
Don’t think of these as just "cymbal mics"—they are "kit mics." By positioning them carefully, you capture a natural, balanced picture of the entire drum set. You can then blend this beautiful stereo image with your close mics to get that final, polished, professional sound. Don't be afraid to move them around and experiment. Your ears will tell you when you've hit the sweet spot.
Mounting and Setup for Flawless Performances
A great drum sound starts with a secure microphone. On a busy stage, especially during an energetic worship set or a packed gig, the last thing you want is a mic stand drifting away from the drum or getting knocked over.
Getting the mounting right is just as crucial as where you place the mic. It’s about building a rock-solid, reliable setup that you can trust, whether it's for a Sunday service or a sold-out show.
Ditch the Stands with Integrated Clips
When it comes to miking your toms and snare, nothing beats the pure convenience of the Sennheiser e604. Its secret weapon is the integrated rim clip that comes right in the box. This simple feature is brilliant—it lets you mount the mic directly to the drum's rim, completely getting rid of the forest of mic stands around the kit.
For any drummer, this is a huge relief. It means less clutter to play around and a much cleaner look on stage. For gigging bands and church sound teams, it means setup and teardown are worlds faster. That's a massive win when you're short on time.
Practical Example: Drummers constantly complain about mic stands getting in their way. The e604's clip-on design solves that problem instantly. It’s a low-profile, "set-it-and-forget-it" fix that lets the drummer focus on playing.
Using the Right Stands for Kicks and Overheads
While clips are a lifesaver for toms, your kick drum and overheads still need proper, sturdy stands. A wobbly or cheap stand is just asking for trouble mid-song.
For Your Kick Drum:
The kick drum mic, like the Sennheiser e602-II, needs a short, heavy-duty stand with a wide, stable base. The sheer force of a kick drum produces low-frequency vibrations that can literally make a lightweight stand "walk" across the stage. A stand with a heavy, cast-iron base isn't going anywhere.
- Practical Example: A short boom stand like the K&M 25950 is perfect. Place it in front of the kick drum and extend the boom just enough to get the mic inside the port hole. Its low center of gravity keeps it from tipping, even if it takes an accidental hit.
For Your Overheads:
Overhead mics, like a pair of e614s, sit high above the kit, making them prone to tipping. The trick is to use a tall, stable boom stand and apply a little bit of physics. Always position one of the tripod legs directly under the boom arm. This simple move dramatically improves the stand's stability by properly distributing the weight.
Clean and Safe Cabling is Non-Negotiable
A stage full of tangled cables doesn't just look sloppy; it's a legitimate safety hazard. One trip can damage expensive gear, injure a musician, and bring your entire performance to a halt. Good cable management is a mark of professionalism.
Here are a few simple ways to keep your cables organized:
- Use Velcro Ties: Once the XLR cable is plugged into the mic, run it down the boom arm and secure it with a couple of Velcro ties. This stops the cable from drooping and creating a mess.
- Route Around the Kit: Run your cables neatly around the edge of the drum rug. In high-traffic areas, use gaffer tape to secure them to the floor.
- Invest in a Sub-Snake: For a truly clean setup, a drum sub-snake is a game-changer. It combines all your drum mic cables into a single, heavy-duty line that runs to your main stage box, making setup incredibly fast and tidy.
By following these practices, your Sennheiser drum mic rig will be secure, reliable, and ready for anything. You can find all the stands, cables, and accessories you need to build a pro-level setup at John Soto Music.
Mixing Your Drums for a Polished Live Sound
Getting your Sennheiser drum mics in the right spots is a huge win, but the real magic happens at the mixing board. This is where you take all those individual drum sounds and sculpt them into a single, punchy, and cohesive kit that drives the entire song.
Think of your mixing console's EQ (equalization) as a sonic chisel. Your microphone captures the raw block of sound, and the EQ is what you use to chip away the stuff you don't want and bring out the character you do. With just a few smart tweaks, you can make your drums hit harder, sound clearer, and sit perfectly with the rest of the band.
EQ Recipes for a Great Live Drum Mix
Every drummer, drum kit, and room is different, so think of these as proven starting points, not rigid rules. I've used these settings for years in live situations, especially with Sennheiser mics. Start here, but always trust your ears and adjust to what sounds best in your room.
1. The Kick Drum (Sennheiser e902):
You're looking for two things: the deep "thump" you feel in your chest and the sharp "click" of the beater that cuts through the noise.
- Boost 60-80Hz: Use a "bell" curve EQ to add that satisfying low-end punch and weight.
- Cut 300-500Hz: This is the "boxy" or "muddy" zone. A generous cut here is one of the fastest ways to clean up a muddy kick sound.
- Boost 3-5kHz: This is where the beater attack lives. A focused boost here adds that essential definition so the kick isn't lost against the bass guitar.
2. The Snare Drum (Sennheiser e604):
You want the snare to have a full body, a satisfying crack, and some sizzle, but without sounding thin or harsh.
- Boost 150-250Hz: This adds the "body" or "fatness" to the snare's fundamental tone.
- Boost 5kHz: Here's the secret to that classic snare "crack" that cuts right through a dense mix.
- High-Shelf Boost at 10kHz: If you're using a bottom snare mic, a gentle high-shelf boost will bring out the bright "sizzle" of the snare wires.
3. The Toms (Sennheiser e604 / MD 421):
Toms need a clear note and a punchy attack, but you don't want a long, muddy ring that clouds up the mix.
- Cut 400-600Hz: Getting rid of the "cardboard box" sound is key. A good scoop in this range cleans up toms almost instantly.
- Boost 5-7kHz: Adding a bit of attack here brings out the sound of the stick hitting the drum head, giving your tom fills more impact and clarity.
4. The Overheads (Sennheiser e614):
Overhead mics are for capturing the cymbals and the overall picture of the kit. The goal is shimmer and air, not harshness or low-end rumble.
- High-Pass Filter (HPF) at 300-400Hz: This is the most important move. Roll off all that low-end mud from the kick and toms. This lets your close mics do their job and cleans up the entire drum mix.
- High-Shelf Boost at 12kHz: A gentle boost here adds that beautiful "air" and "shimmer" to the cymbals, making them sound crisp and detailed instead of clangy.
These EQ moves are really about creating space for everything. When you cut the boxy sound from the toms, you make room for the guitars. When you boost the click of the kick drum, it finds its own lane next to the bass. It’s an auditory puzzle, and EQ is your most important tool for getting all the pieces to fit together.
Adding Punch and Control with Dynamics
Alright, once your EQ is dialed in, two other tools will take your drum mix from good to great: gates and compressors.
Noise Gates for a Cleaner Sound:
A noise gate is basically an automatic mute switch. You set a volume level, and if the mic signal (like from a tom) drops below that threshold, the gate closes and mutes the channel. This is incredibly useful for getting rid of cymbal bleed in your tom mics, which gives you a much tighter and cleaner drum sound.
Compression for Punch and Consistency:
A compressor's job is to reduce the dynamic range—the gap between the loudest and quietest sounds. On drums, this adds serious punch and control.
- Practical Example on a Snare: Put a compressor on the snare channel. Suddenly, every hit, from the softest ghost note to the loudest backbeat, is more even and present in the mix. If you set a slower attack time, you let the initial "crack" of the snare jump through before the compression engages, making it sound even punchier.
The whole pro audio world relies on these techniques. This is where great mics like the Sennheiser drum mic series really show their value, powering incredible sound for performers, churches, and schools. The global microphone market hit $7.21 billion in 2024, with North America making up over 40% of that—fertile ground for US-based worship teams and bands. The cardioid pattern, which is standard on a Sennheiser drum mic, holds a massive 35.83% market share for a reason: it's fantastic at rejecting feedback, a critical need when mixing drums for a live audience. You can discover more insights about these microphone market trends on grandviewresearch.com.
By combining great microphones with these mixing techniques, you'll be on your way to a powerful drum sound. Find the perfect Sennheiser drum mic package for your needs at John Soto Music and let's get you started.
Curated Sennheiser Packages for Every Need
Okay, we've covered the individual mics and what makes them tick. Now, let's put it all together. Picking and choosing can be a headache, so we've done the work for you and created three complete Sennheiser drum mic packages, available right here at John Soto Music.
Think of these as proven recipes for great drum sound. We’ve bundled the exact mics you need for the most common situations, whether you're miking drums at church, for a gigging band on the road, or in your own studio. This takes all the guesswork out of the equation.
Each package gives you the right tool for every part of the kit, from the deep punch of the kick to the crisp detail of the cymbals. Let's find the one that fits you best.
The Worship Essentials Kit
For churches and houses of worship, the name of the game is clarity, reliability, and ease of use. This package is built around the workhorse e600 series, delivering fantastic sound that volunteer audio teams can set up perfectly week after week. It’s all about getting consistent, high-quality results with minimal fuss.
- Kick: (1) Sennheiser e602-II – This mic’s pre-EQ’d sound is a lifesaver. It gives you that perfect low-end punch and beater click right out of the box, which means your volunteers can get a great kick tone without touching the EQ.
- Snare/Toms: (3) Sennheiser e604 – The compact, clip-on design is a huge plus. It makes setup a breeze and keeps the drum riser looking clean and uncluttered, which is crucial on a crowded stage.
- Overheads: (2) Sennheiser e614 – These mics capture the cymbals with beautiful clarity and shimmer, but without any of the harshness you get from cheaper condensers. They help create a balanced kit sound that sits perfectly in a worship mix.
This kit provides everything you need for a powerful, articulate drum sound that supports the music without overpowering the congregation.
The Gigging Band Package
This package is built for the road. It’s all about durability, super-fast setup, and a sound that cuts through the mix in any club or venue. We’ve mixed the rugged e600 series with a premium e900 series kick mic to deliver that extra punch and presence live audiences expect.
Practical Example: This setup is the road warrior's dream. When you're loading in at a new venue every night, you need gear that is not only tough but also delivers predictable, professional results instantly. This package does exactly that.
- Kick: (1) Sennheiser e902 – We chose this mic for its tight, focused attack. The e902 ensures your kick drum is not just heard, but felt, even in the muddiest, noisiest rooms.
- Snare/Toms: (4) Sennheiser e604 – Four of these clip-on workhorses will cover a standard snare and three-tom setup in minutes. For quick changeovers between bands, you just can't beat their speed and reliability.
- Overheads: (2) Sennheiser e614 – The super-cardioid pattern on these is key for live work. It offers excellent rejection of sound from the sides, helping to isolate your cymbals from loud stage amps and monitor feedback.
The Studio Starter Pack
When you’re recording in a home or project studio, capturing every bit of detail and nuance is what matters most. This package is built around the premium e900 series, delivering the refined, high-fidelity sound you need to produce professional-level tracks.
- Kick: (1) Sennheiser e902 – Its precise low-frequency response and incredibly fast transient detail are perfect for capturing a kick drum tone that’s already mix-ready.
- Snare: (1) Sennheiser e906 – While it's a legend on guitar cabs, the e906 is a fantastic and often overlooked choice for snare drums. Its crisp character and tight pickup pattern give you a focused snare sound with great isolation.
- Toms: (2) Sennheiser MD 421 II – This is a true studio legend for a reason. It captures a warm, full-bodied tone on toms that is simply unmatched. The 5-position bass roll-off switch gives you incredible sonic control right at the source.
- Overheads: (2) Sennheiser e914 – These are premium small-diaphragm condensers that capture a smooth, articulate, and incredibly detailed stereo image of the entire kit. This is how you get that professional polish.
Ready to build your ideal setup? Explore these options and more at John Soto Music to get the perfect Sennheiser drum mic package for your stage or studio.
Your Top Sennheiser Drum Mic Questions, Answered
When you're looking at a wall of drum mics, a few questions always come up. We hear them all the time from gigging bands, worship leaders, and school music directors. Getting straight answers helps you cut through the noise, solve problems, and get back to what matters: getting a great drum sound.
Let's clear up some of the most common questions we get about Sennheiser drum mics.
What's the Real Difference Between the e600 and e900 Series?
This is easily the number one question we're asked. Think of it like this: the Sennheiser e600 series (like the e604 and e602) is your professional workhorse line. They are built like tanks, sound fantastic, and offer incredible value. This makes them the go-to choice for gigging musicians, schools, and most churches. They just work.
The Sennheiser e900 series (e.g., e904, e902) is the next step up, designed for high-end touring and critical studio recording. These mics have more refined components inside, delivering a sound that’s more detailed and pre-shaped right out of the box.
The Bottom Line: Both series will give you a professional, stage-ready sound. The e900s just give you that extra 10% of sonic detail and clarity that top-tier engineers want for major tours or pristine studio albums.
Practical Example: A touring sound engineer might grab an e902 for the kick because its faster response gives him a tighter, punchier low-end that cuts through a dense rock mix. Meanwhile, your church's sound team will get a phenomenal and reliable kick sound from the e602 week after week, year after year.
Can I Just Use One Mic for My Whole Drum Kit?
Technically, yes. You can capture a drum kit's overall vibe with one or two overhead mics, which is a classic technique for old-school jazz or some folk music. But for just about any modern style—rock, pop, R&B, or contemporary worship—you’ll lose all the punch, definition, and control you need.
Modern music relies on the ability to mix each drum individually.
Using a dedicated Sennheiser drum mic on each drum—like an e902 on kick and e604s on your toms—is what lets a sound engineer balance everything perfectly. This is absolutely essential for making the drums sit powerfully in a full band mix instead of turning into a chaotic, muddy mess.
Do I Need Phantom Power for These Mics?
This is a critical question, and the answer depends entirely on the type of microphone. Getting this right is fundamental to a successful setup.
Here’s the simple breakdown:
- Dynamic Mics = NO Phantom Power. The majority of close mics for drums are dynamic. This includes workhorses like the Sennheiser e602 (kick), e604 (toms), and the legendary MD 421 (toms). They generate their own signal and do NOT need phantom power.
- Condenser Mics = YES, Phantom Power. Mics used for capturing the shimmer and detail of cymbals are almost always condensers. Mics like the Sennheiser e614 or e914 that you use for overheads DO require +48V phantom power to work.
Don't worry, phantom power is a standard feature on nearly every modern mixer. Just find the "+48V" button on your console and make sure you only press it for the channels your condenser mics are plugged into.
We hope these answers give you the confidence to get the most out of your gear. Building a reliable, great-sounding system is completely achievable for any band, school, or church. At John Soto Music, we specialize in providing the road-ready brands and expert guidance you need to make it happen.